Hands-on Explanation of the Inverse-Square Law for Light in Photography
No worries - this law of light sounds very mathematical, but you will be able to grasp the concept of it without having a degree in math. I am a bit of an idiot about everything with numbers, but even I can make use of this knowledge without having to use a calculator and a cheat sheet.
Maybe you’re new to taking photos with a light you control and are having thoughts like
Light, square law, inverse, math, physics - WTF am I even doing here?!
Maybe you’re someone who just moves the light source closer to the subject if you want more light, and further away if you want less light. That’s not completely wrong, but there is so much more to this simple action than just that. And if you know what, you can make use of it in a much more controlled way than just guessing!
The Concept of The Inverse-Square Law
If you understand the following two very simply put concepts, you can already go ahead and use your light in a much more effective way:
- Light doesn’t only get darker when the light source is further away. The amount of degree that it gets darker decreases with the distance between light souce and subject.
WTF?
Example: The light on your subject is perfect with the subject being 0,5m away from your light source. As soon as the subject steps back 0,5m, the light might already be too dark. However, if the light on your subject is perfect with the subject being 5m away from your light source, it doesn’t really matter whether the subject steps back to 5,5m. (This is called light fall-off. The fall-off decreases with the distance.)
- The light appears softer as the light source gets larger.
WTF?
Example: Of course the light source doesn’t get larger for real. However, the light rays coming from the light source spread and can cover a bigger area if they’re further away, so in the end the light source is bigger relative to the subject. Larger light sources make for softer light (which is why usually you want to go for big soft boxes, bounced flash or clouded sky if you want soft light). On top of that, the above mentioned decreased light fall-off means less contrast betwee more and less lit areas.
Visualization of The Inverse-Square Law
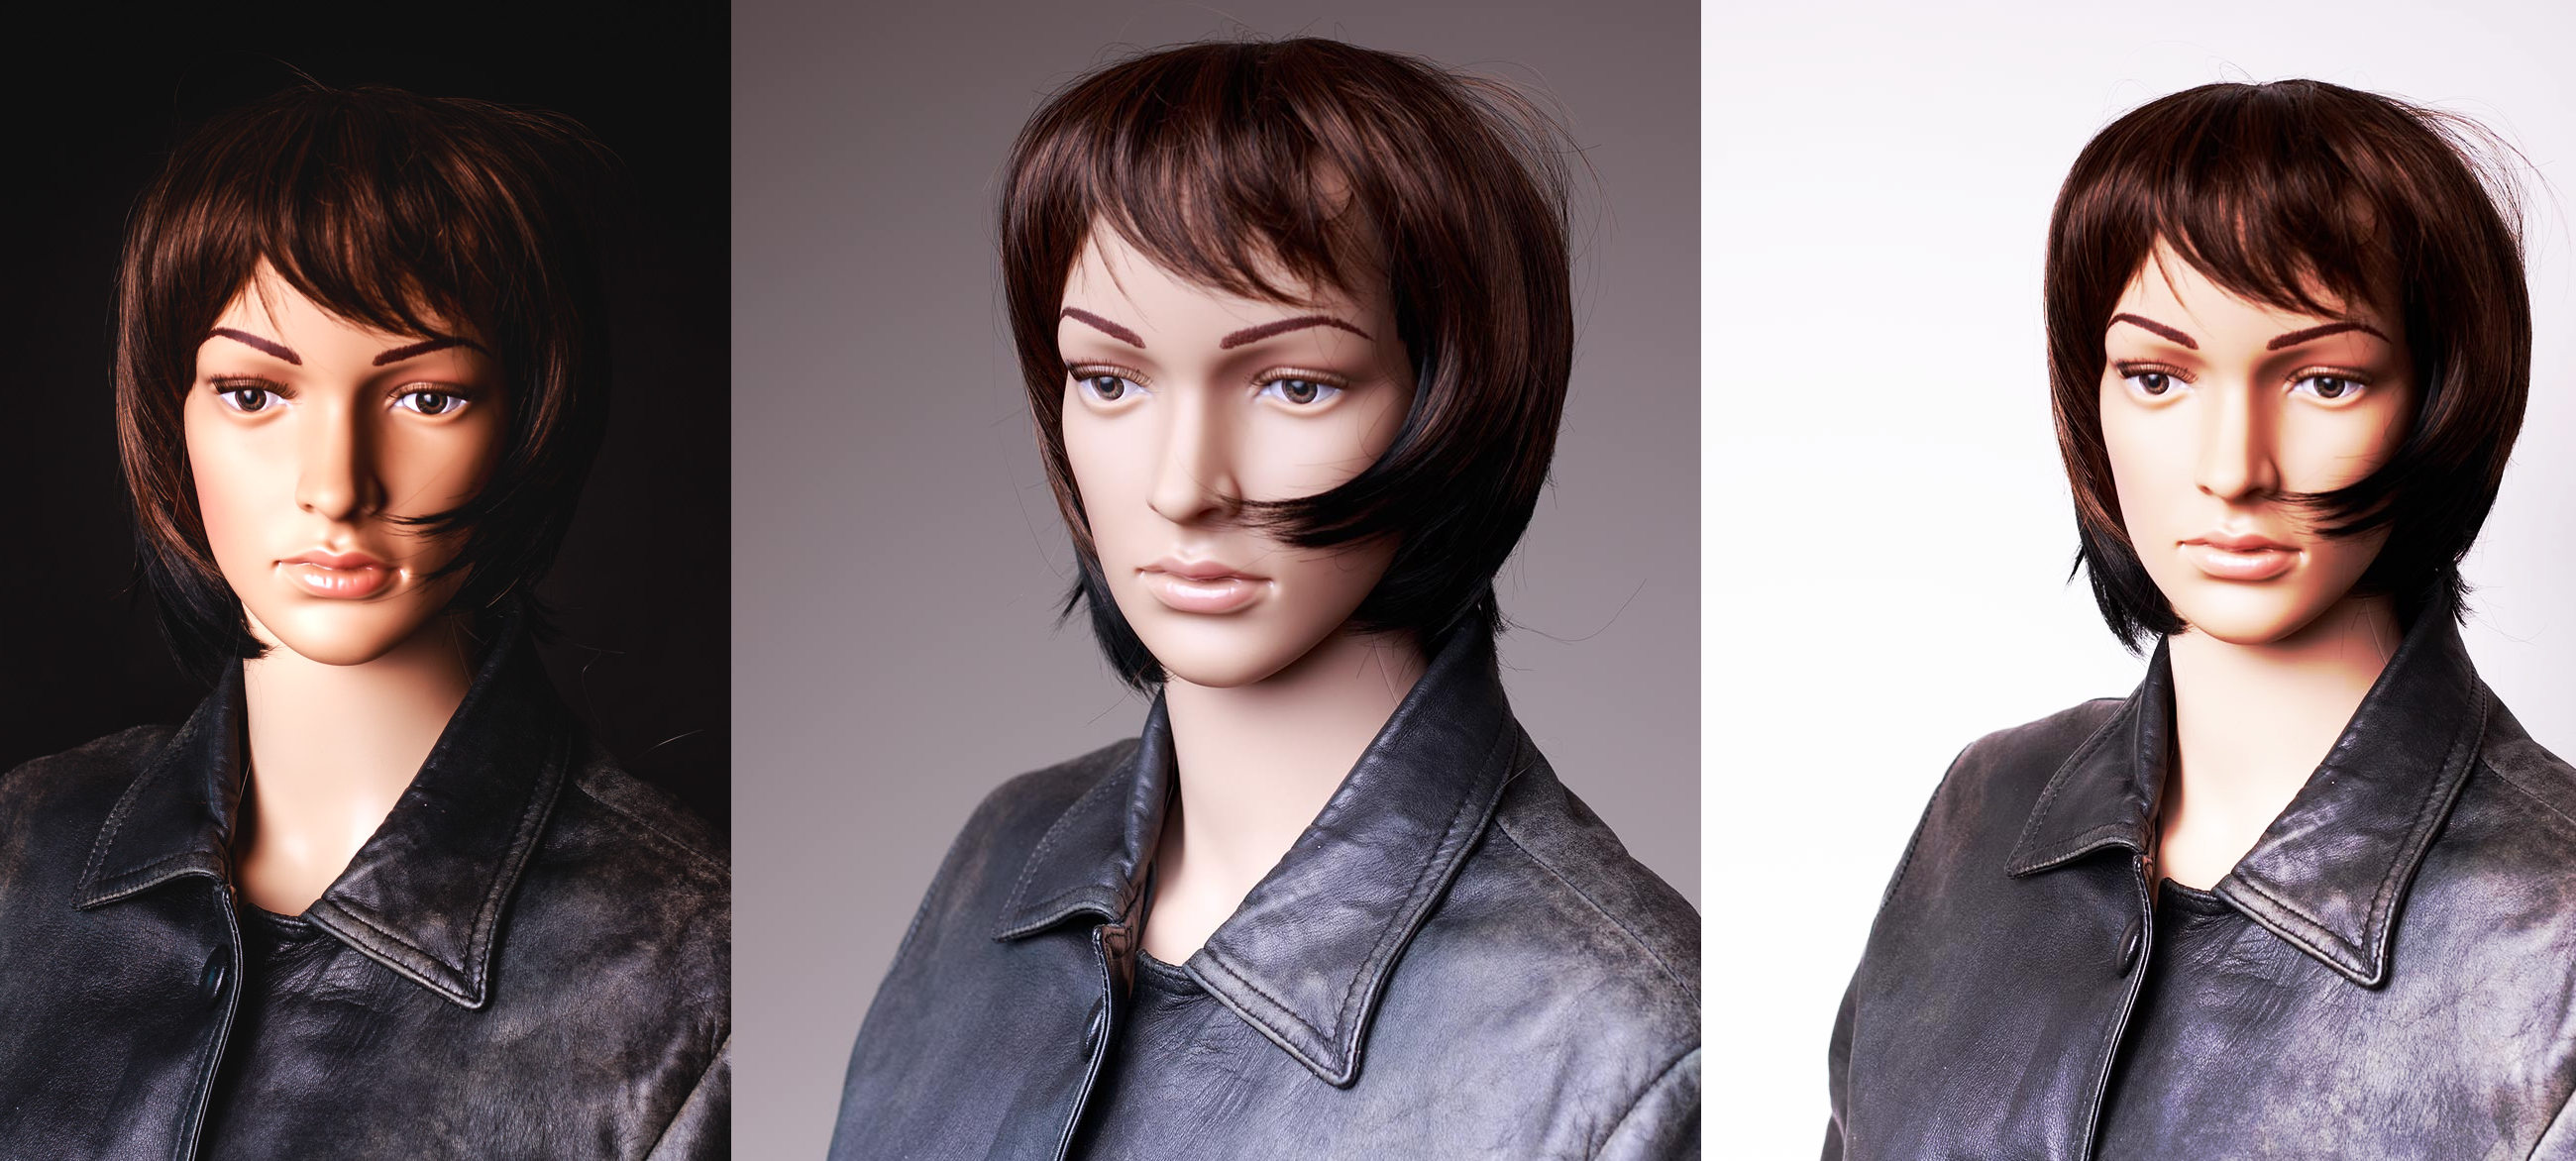
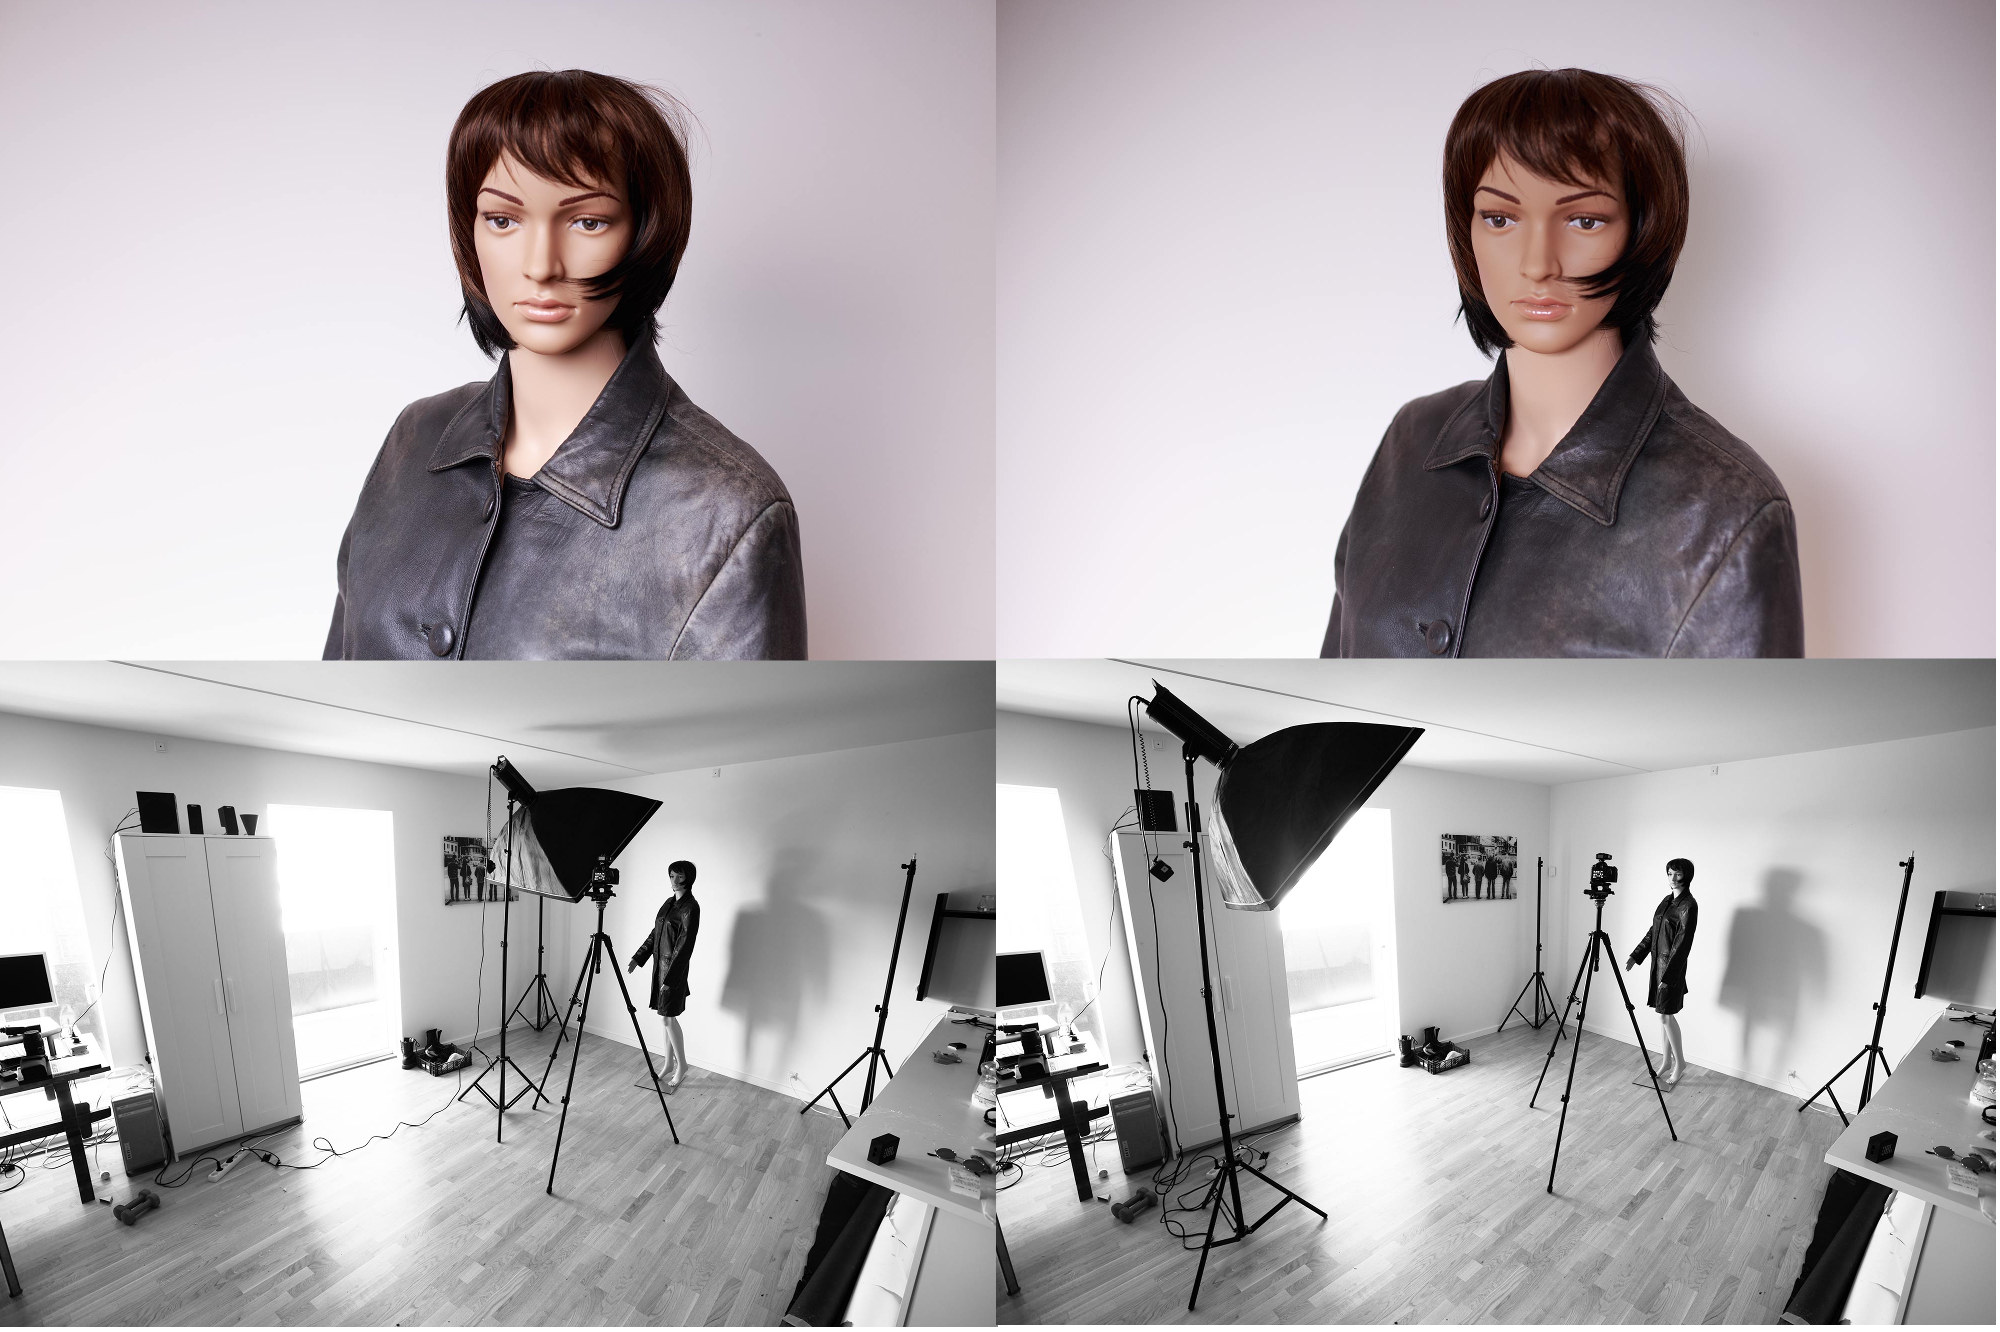
Here are some examples taken with one studio strobe and a pull back shot to illustrate the distances. These photos are all straight out of camera without any form of editing (apart from the pull back shots obviously). I set it up pretty fast to show the differences, so I wasn’t very careful with pointing the strobes on point.
First, I placed the subject, our new beautiful mannequin doll, a short distance from the black background and took shots while moving the strobe further away. As the power of the strobe decreases, I have to adjust the settings of my camera to keep the correct exposure (about 2 f-stops per meter, that I move the strobe).
The biggest difference is between the top left photo and the top right photo. The contrast between light and dark areas decreases and the light appears softer. The bottom left and bottom right photos appear similar, even though you still can make out a little difference in the shadows if you look closely.
- The top photos are most similaras the light fall-off is strongest close to the lightsource.
- The background won’t get black by just moving away the light, as we have to compensate for the weaker light by changing the camera settings - which again brings back light to the background.
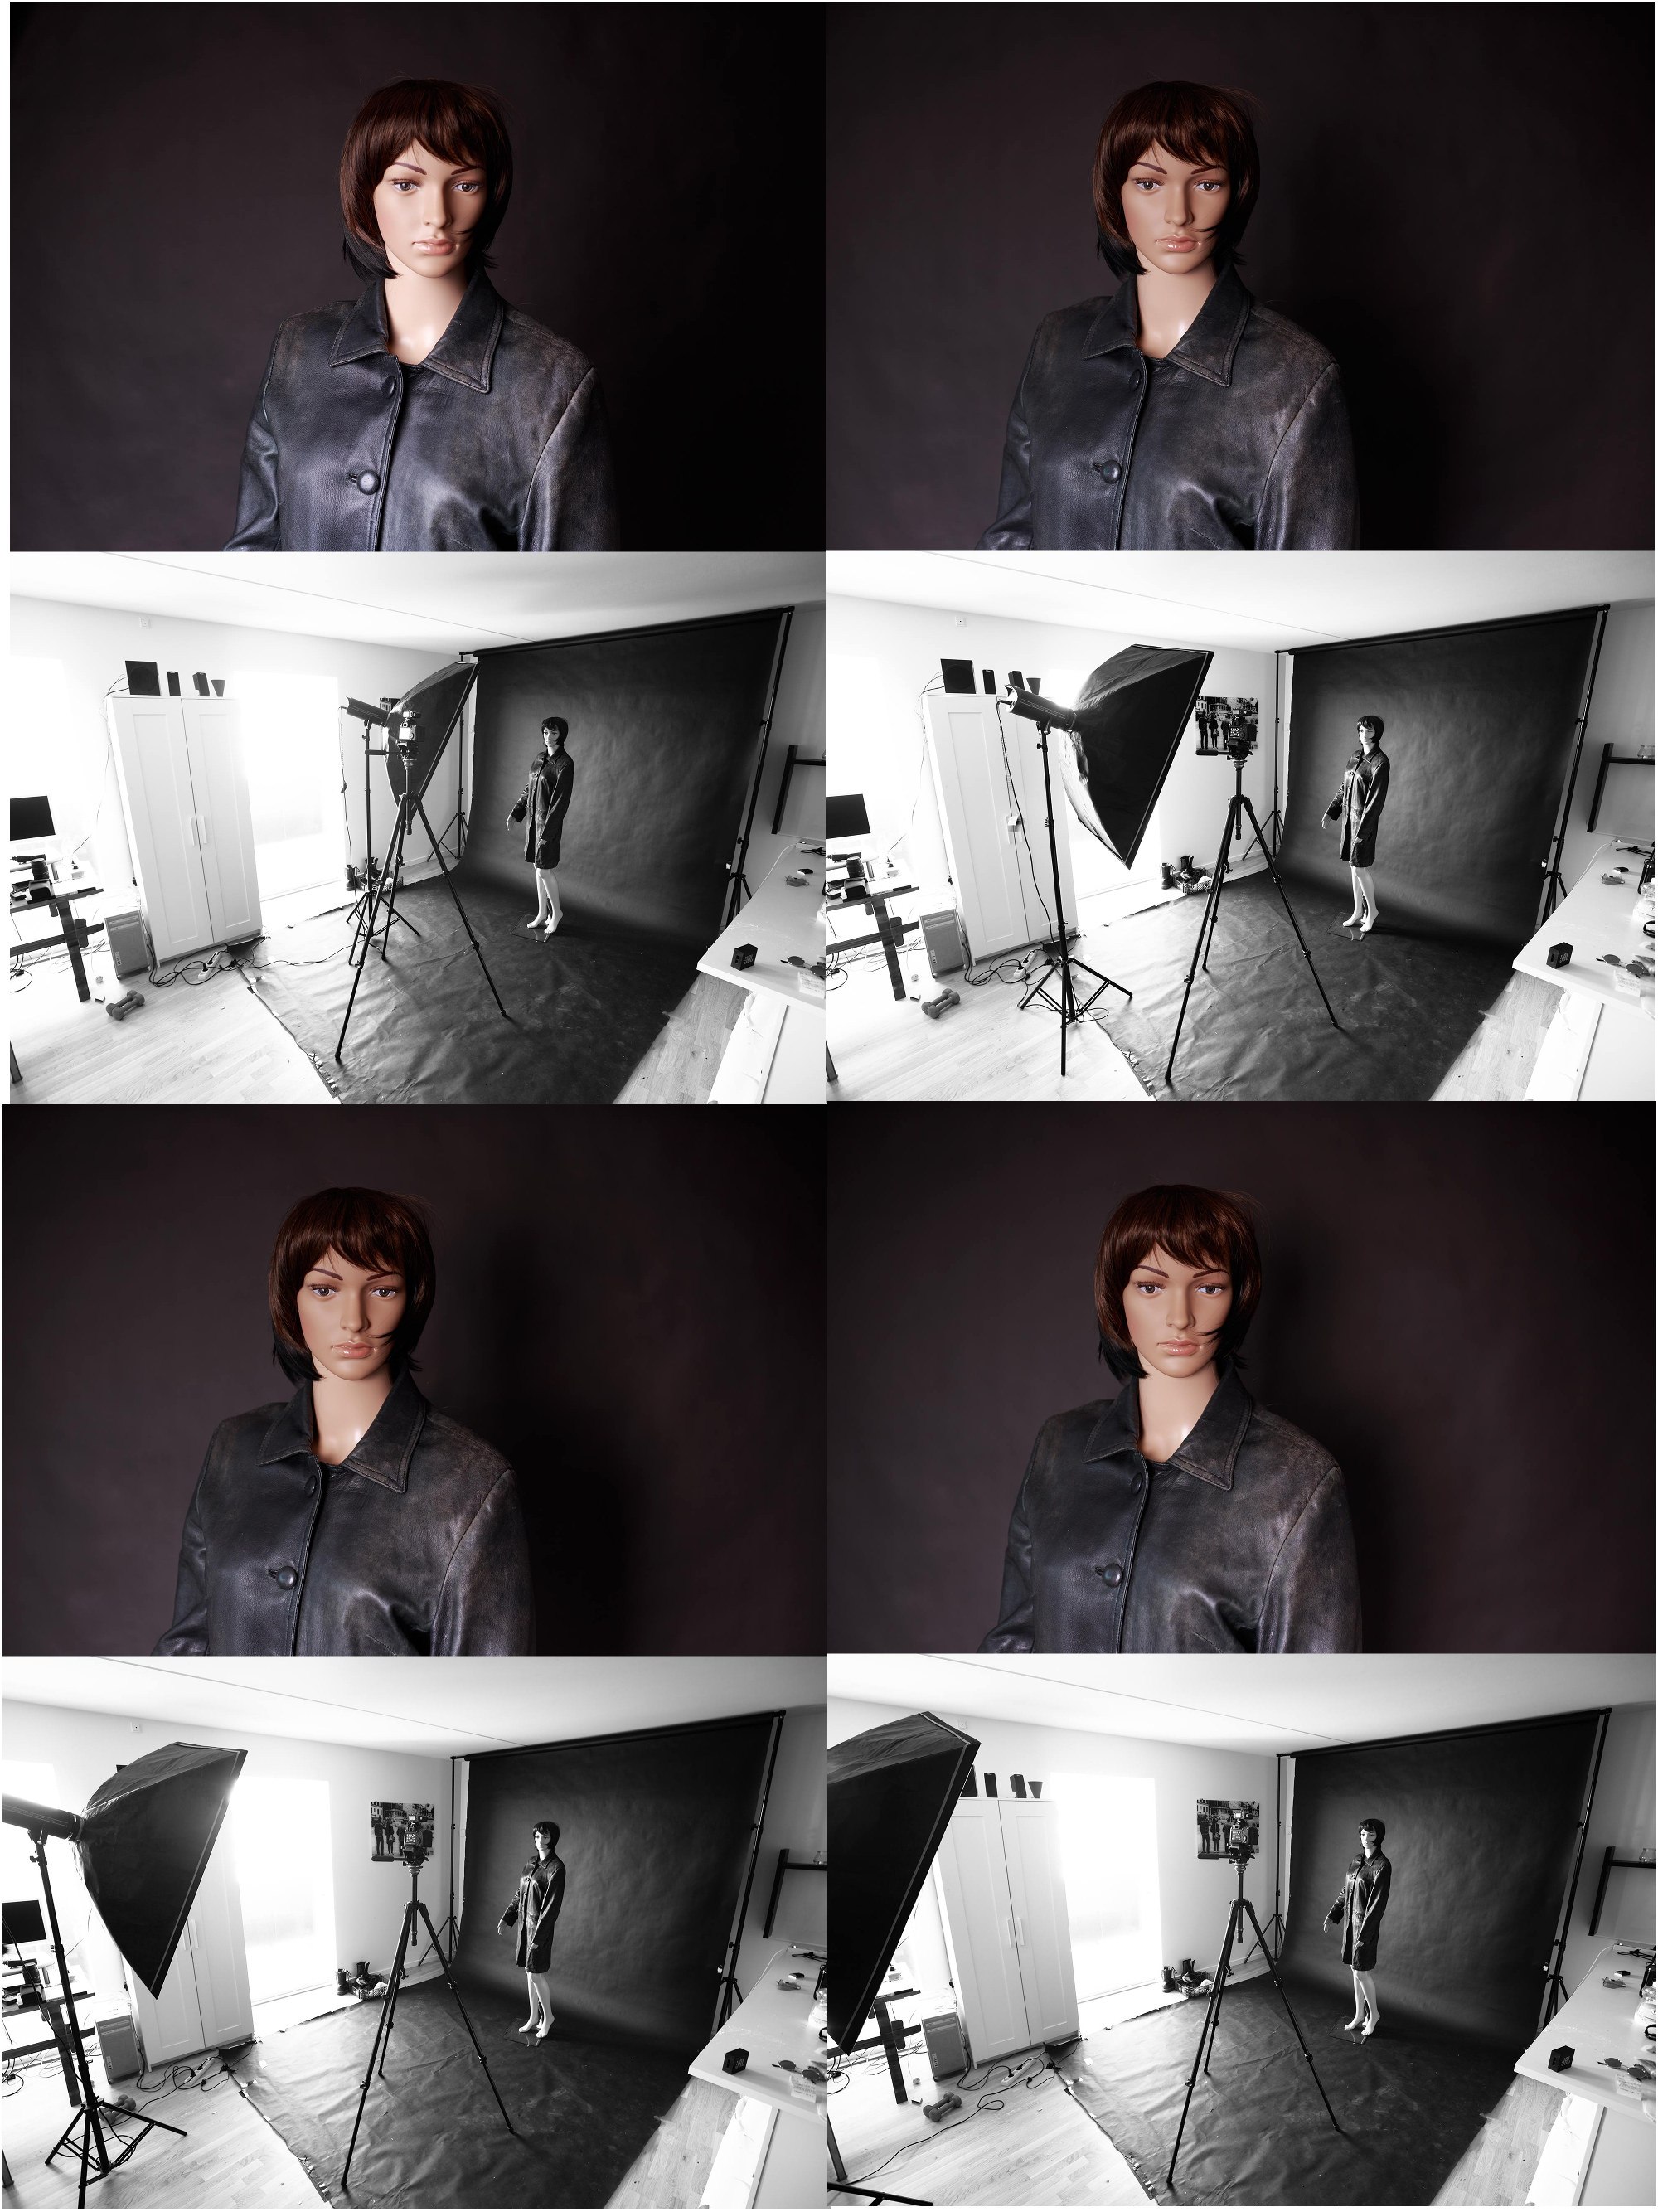
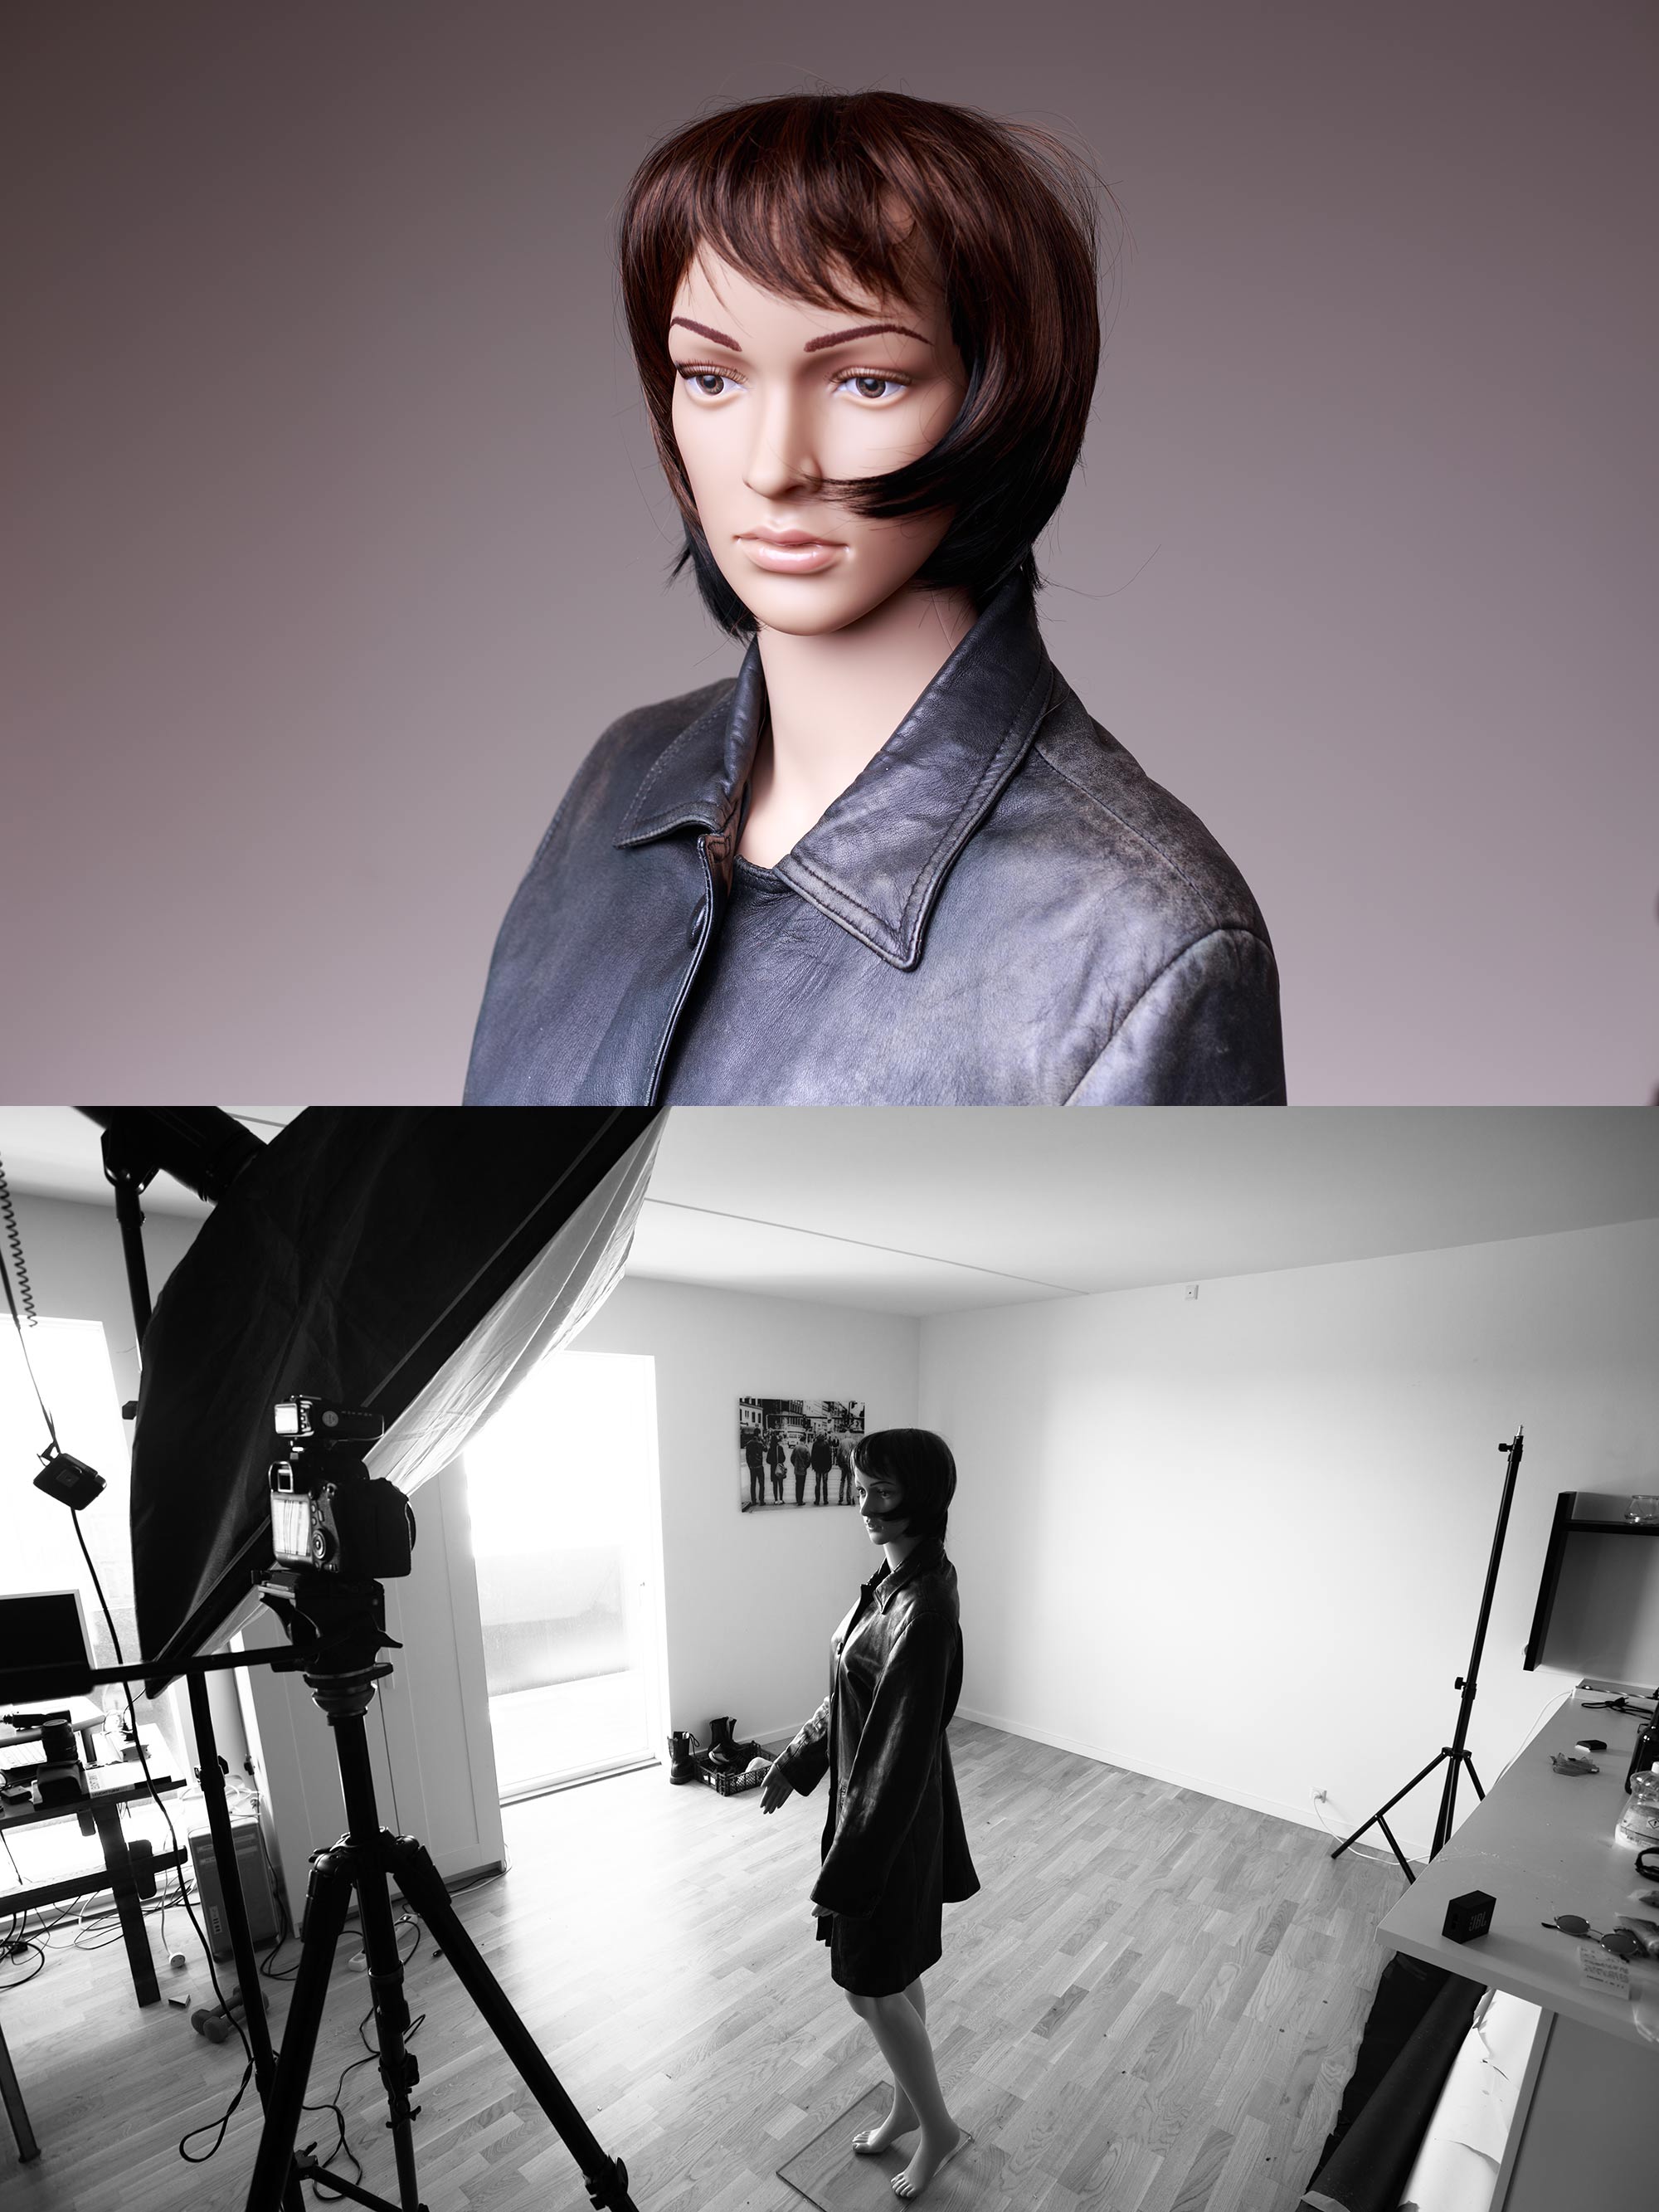
This is how it looks, when I keep the distance between light source and subject the same (well, roughly - I didn’t actually measure), but increase their distance to the background:
With only minimal editing you can quickly make the background darker:
The same goes for a white background - either because you want to have a white background, or because you want to have a grey background (cause your subject turned up in a white shirt and you don’t have the possibiliy or wish to change to a different background, for example).
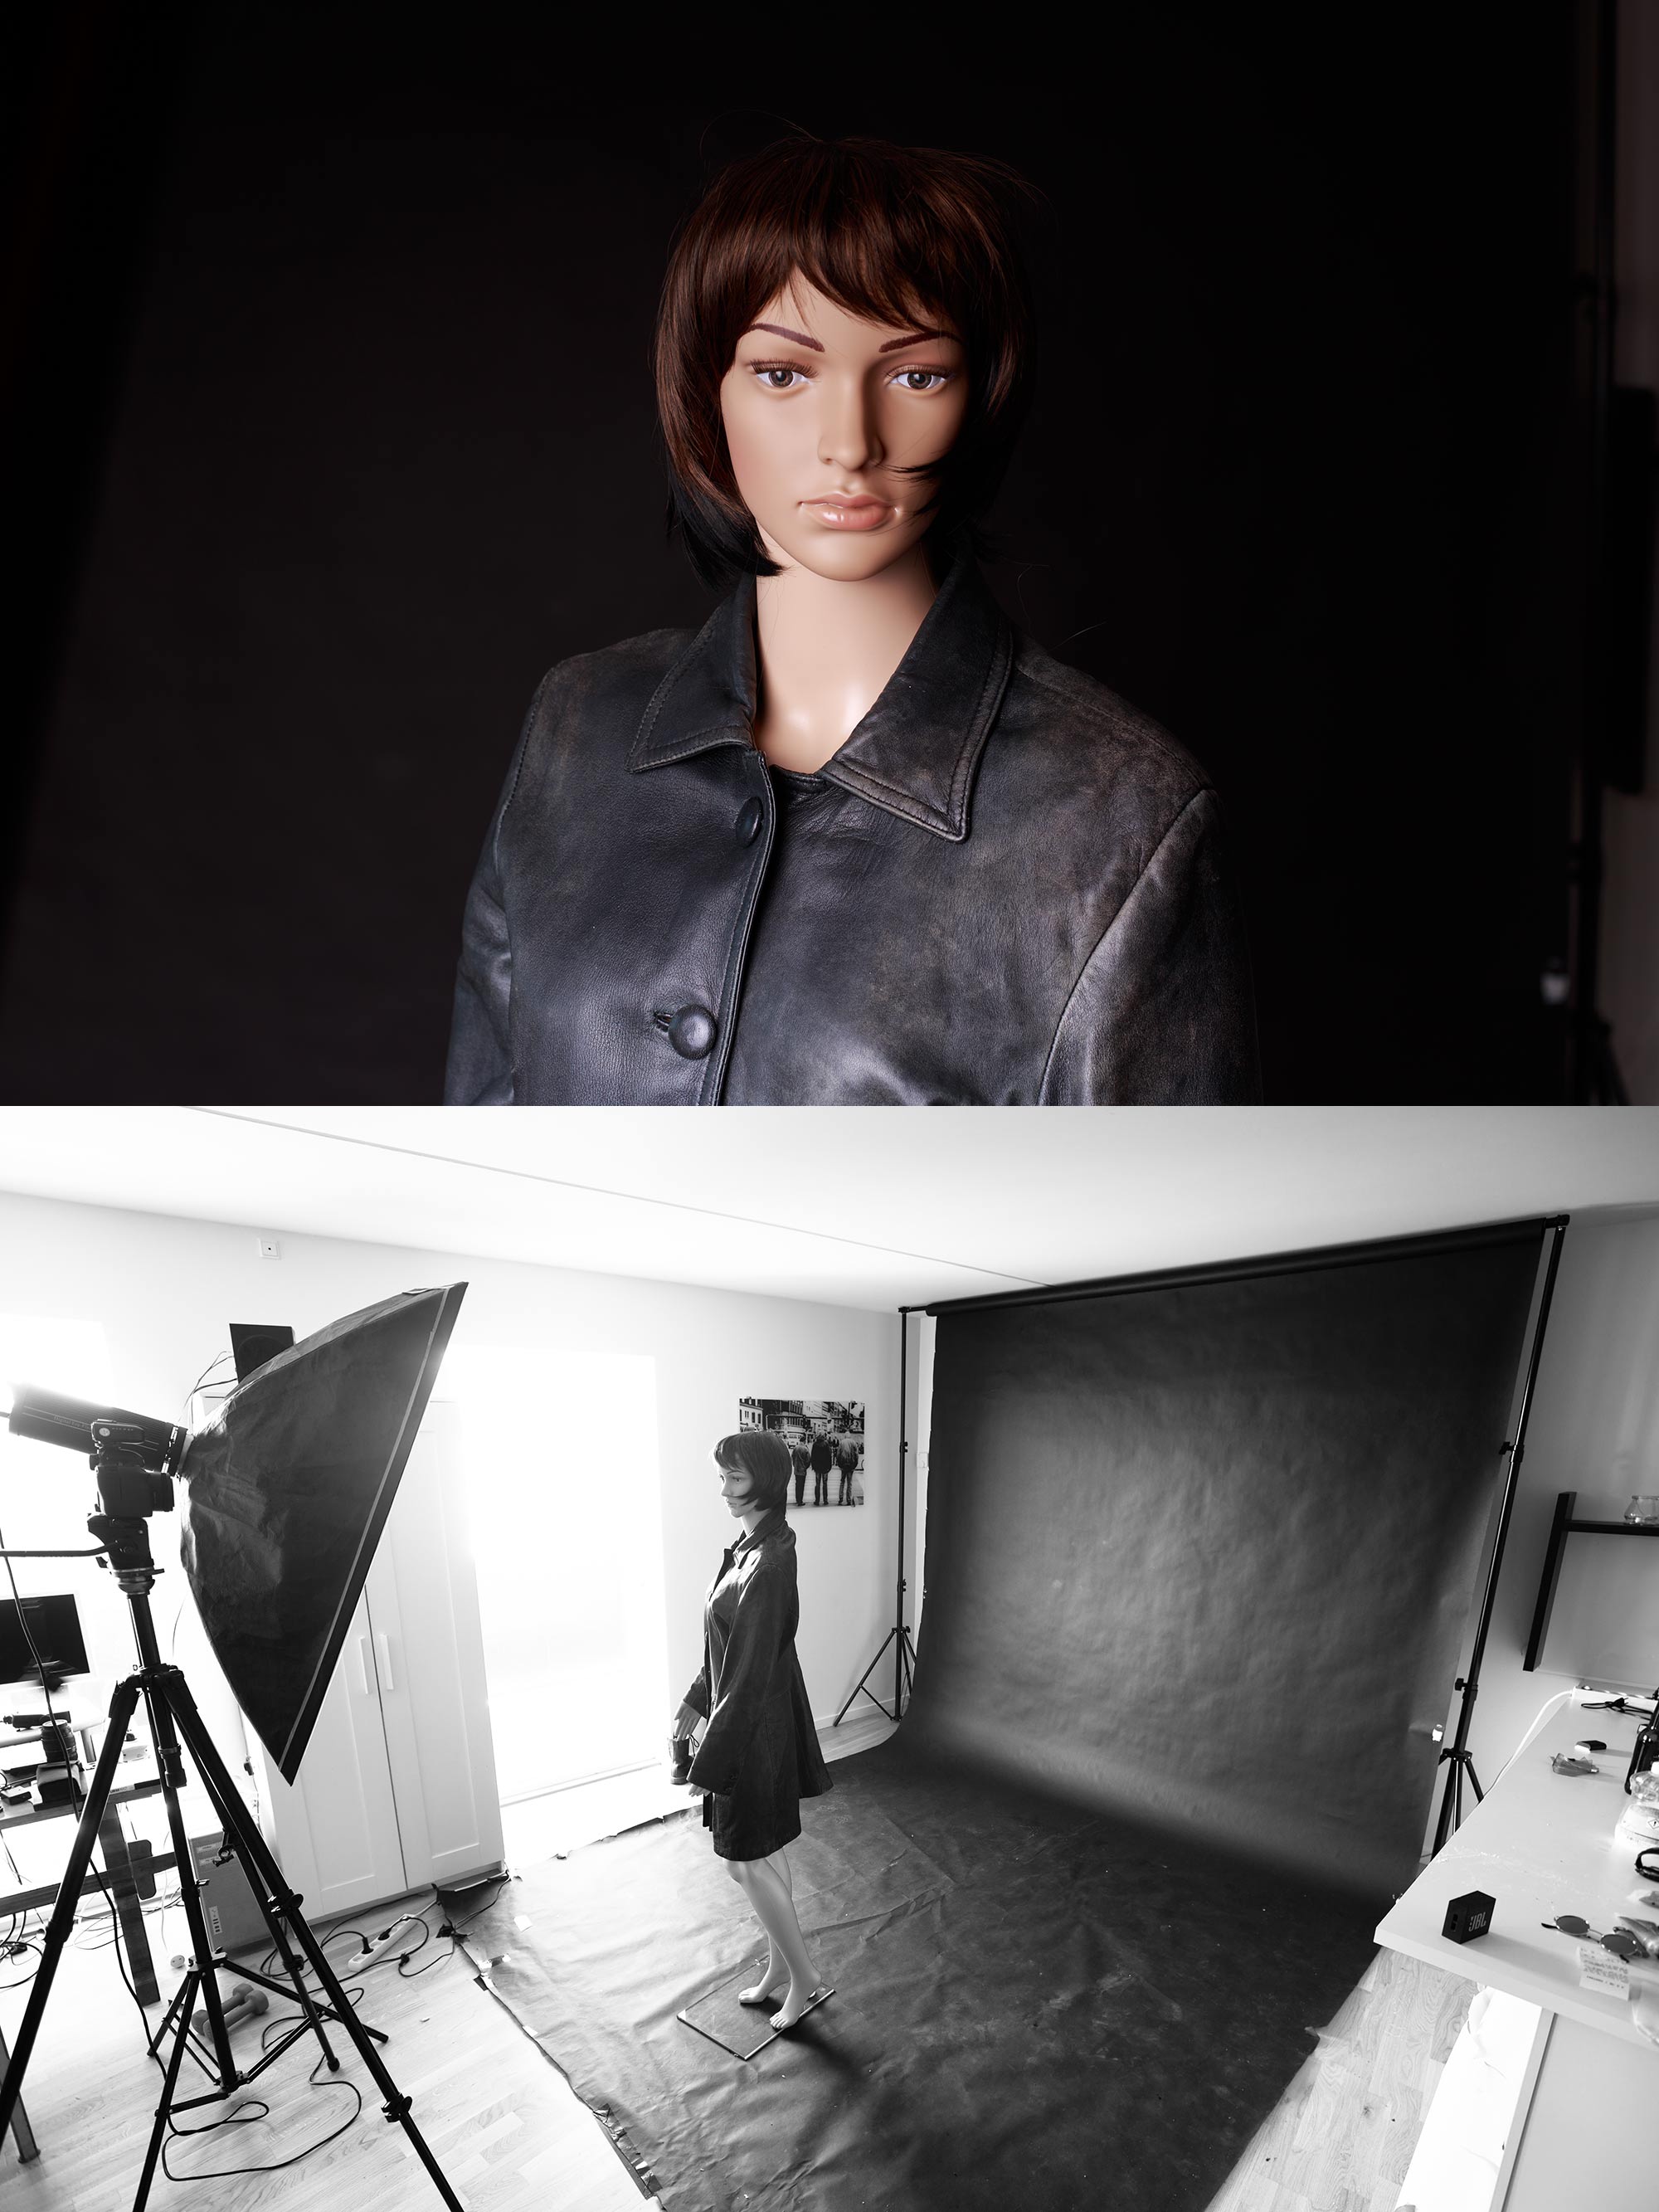
First, this is how it looks if I only move the light source while keeping the mannequin doll where it is:
If I actually don’t want to have a white background, I can just move the subject further away from the background and thus using the light fall-off to underexpose the white background:
The rule basically works for different light sources you can use for photography. For these shots I used the available daylight coming throuhgh the window:
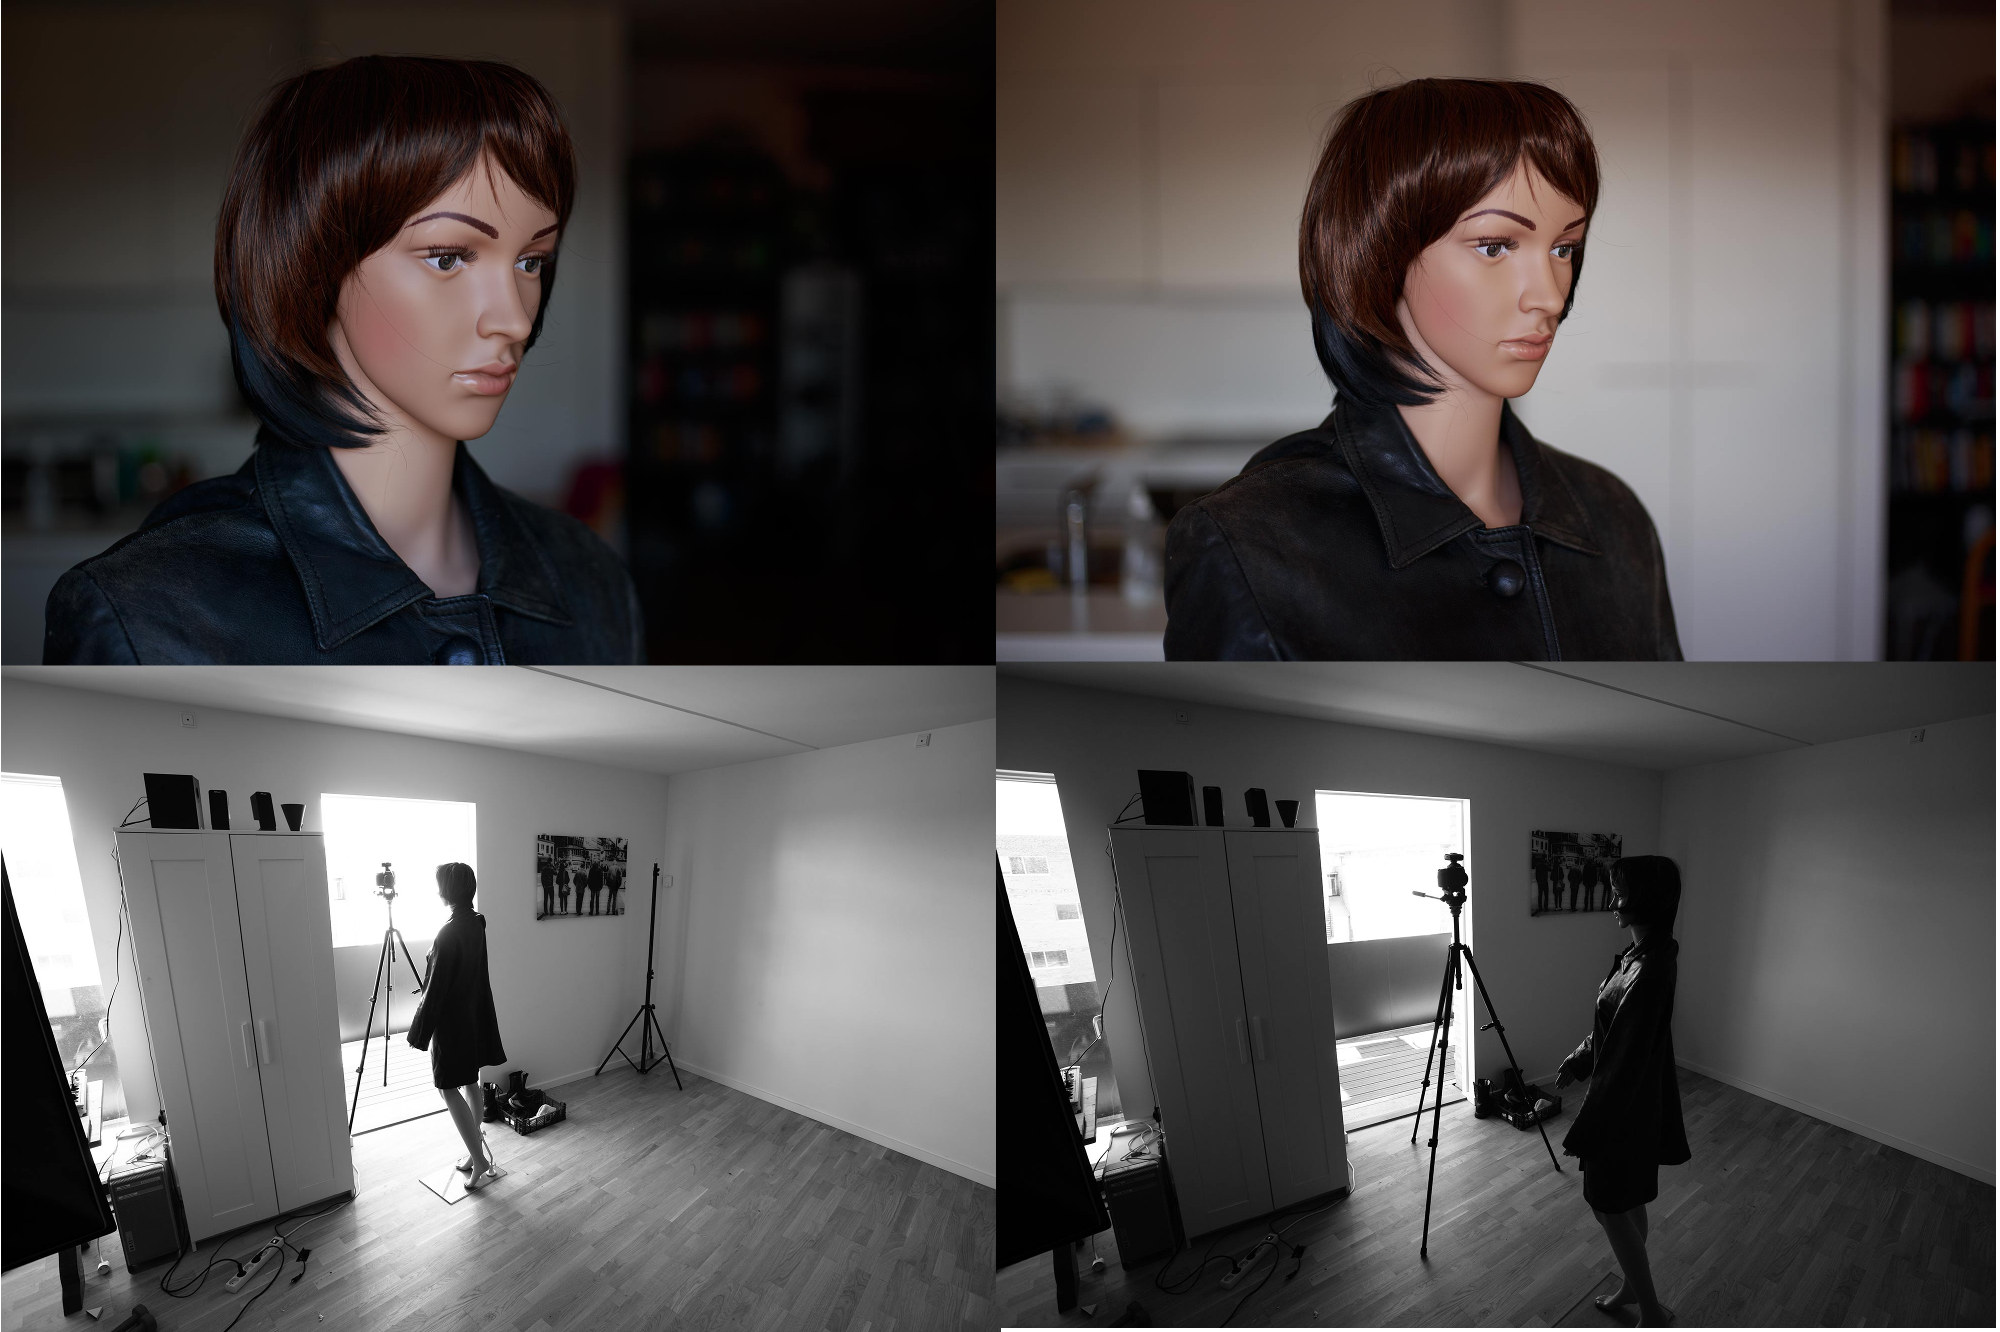
In the first photo, the doll was placed close to the window. Due to the light fall-off the background appears darker. When moving away from the window, the fall-off decreases thus decreasing the overall contrast in the picture.
How to Use The Inverse-Square Law
So now I learned something about the math and physics of light. And how I can use that?
There are two cases where I consciously and actively take my knowledge about the inverse-square law into consideration (now only talking studio photography):
- When I need to make a decision about the color of the background. Should it be white, grey or black? (We have white and black paper backgrounds.)
- When I need to make a decision about the type of light I want on my subject. Should it be soft and flattering or contrasty?
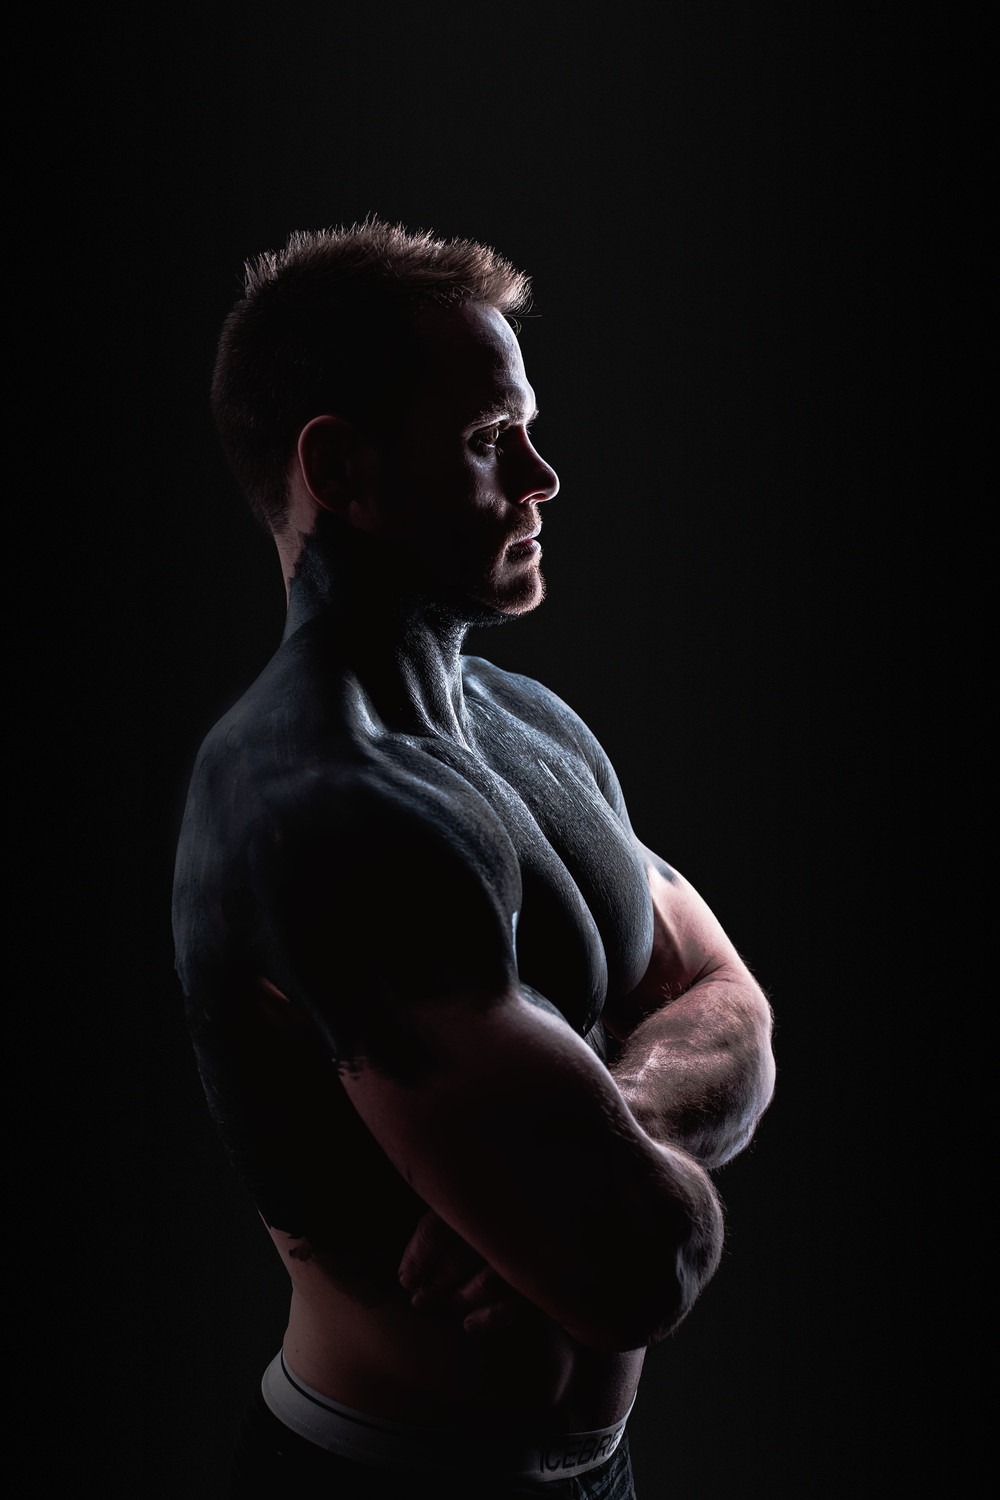
I had this photo of Greg (see the whole series here) in mind before I shot it. I knew I wanted a black background and almost only his outline illuminated. So beforehand I already knew the following:
- To get a black background, both Greg and the light source (one studio strobe with a rectangular soft box) had to be a great deal away from the black paper-background.
- I only wanted the outline of his profile outlined, which meant that he had to face the light source. He was standing 10 cm away from the softbox, but it was angled so it would barely hit his one side
During shooting, we figured that he couldn’t stand centered relatlively to the light source, as his face would still be almost completely lit. So he stepped sideways, closer to me. I could have prevented his other shoulder to be lit by for example flagging the light.
The background is still black as the distance to the background wasn’t changed. However, the light fall-off on Greg’s face is less distinct than on the other photo. The dark side of his face is a little brighter than the dark part in the previous photo.
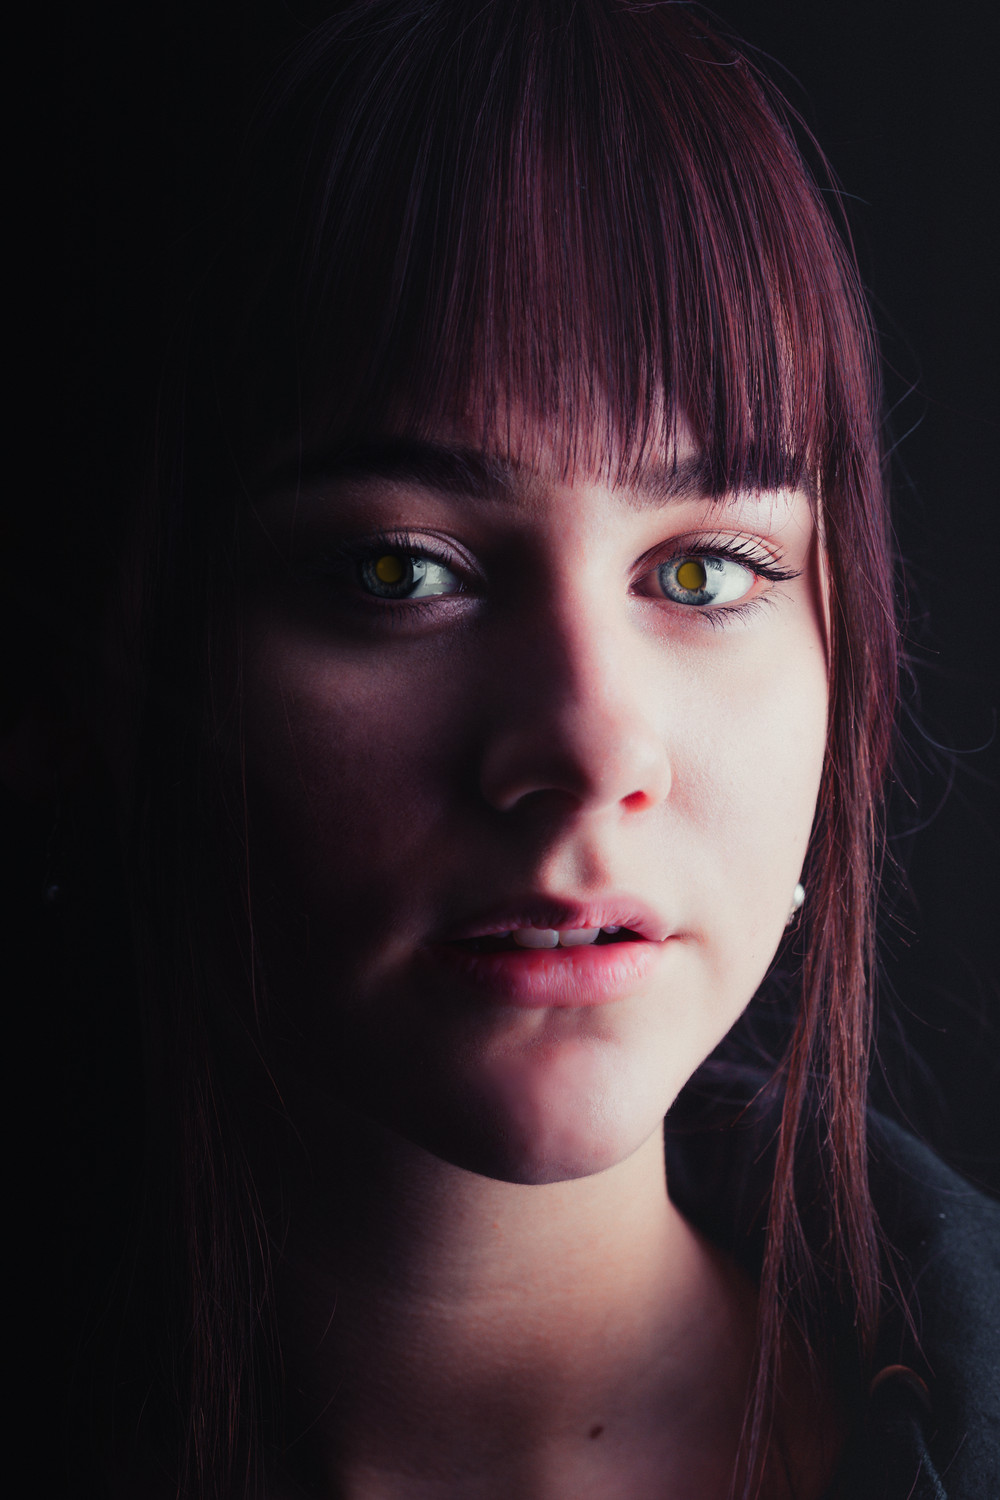
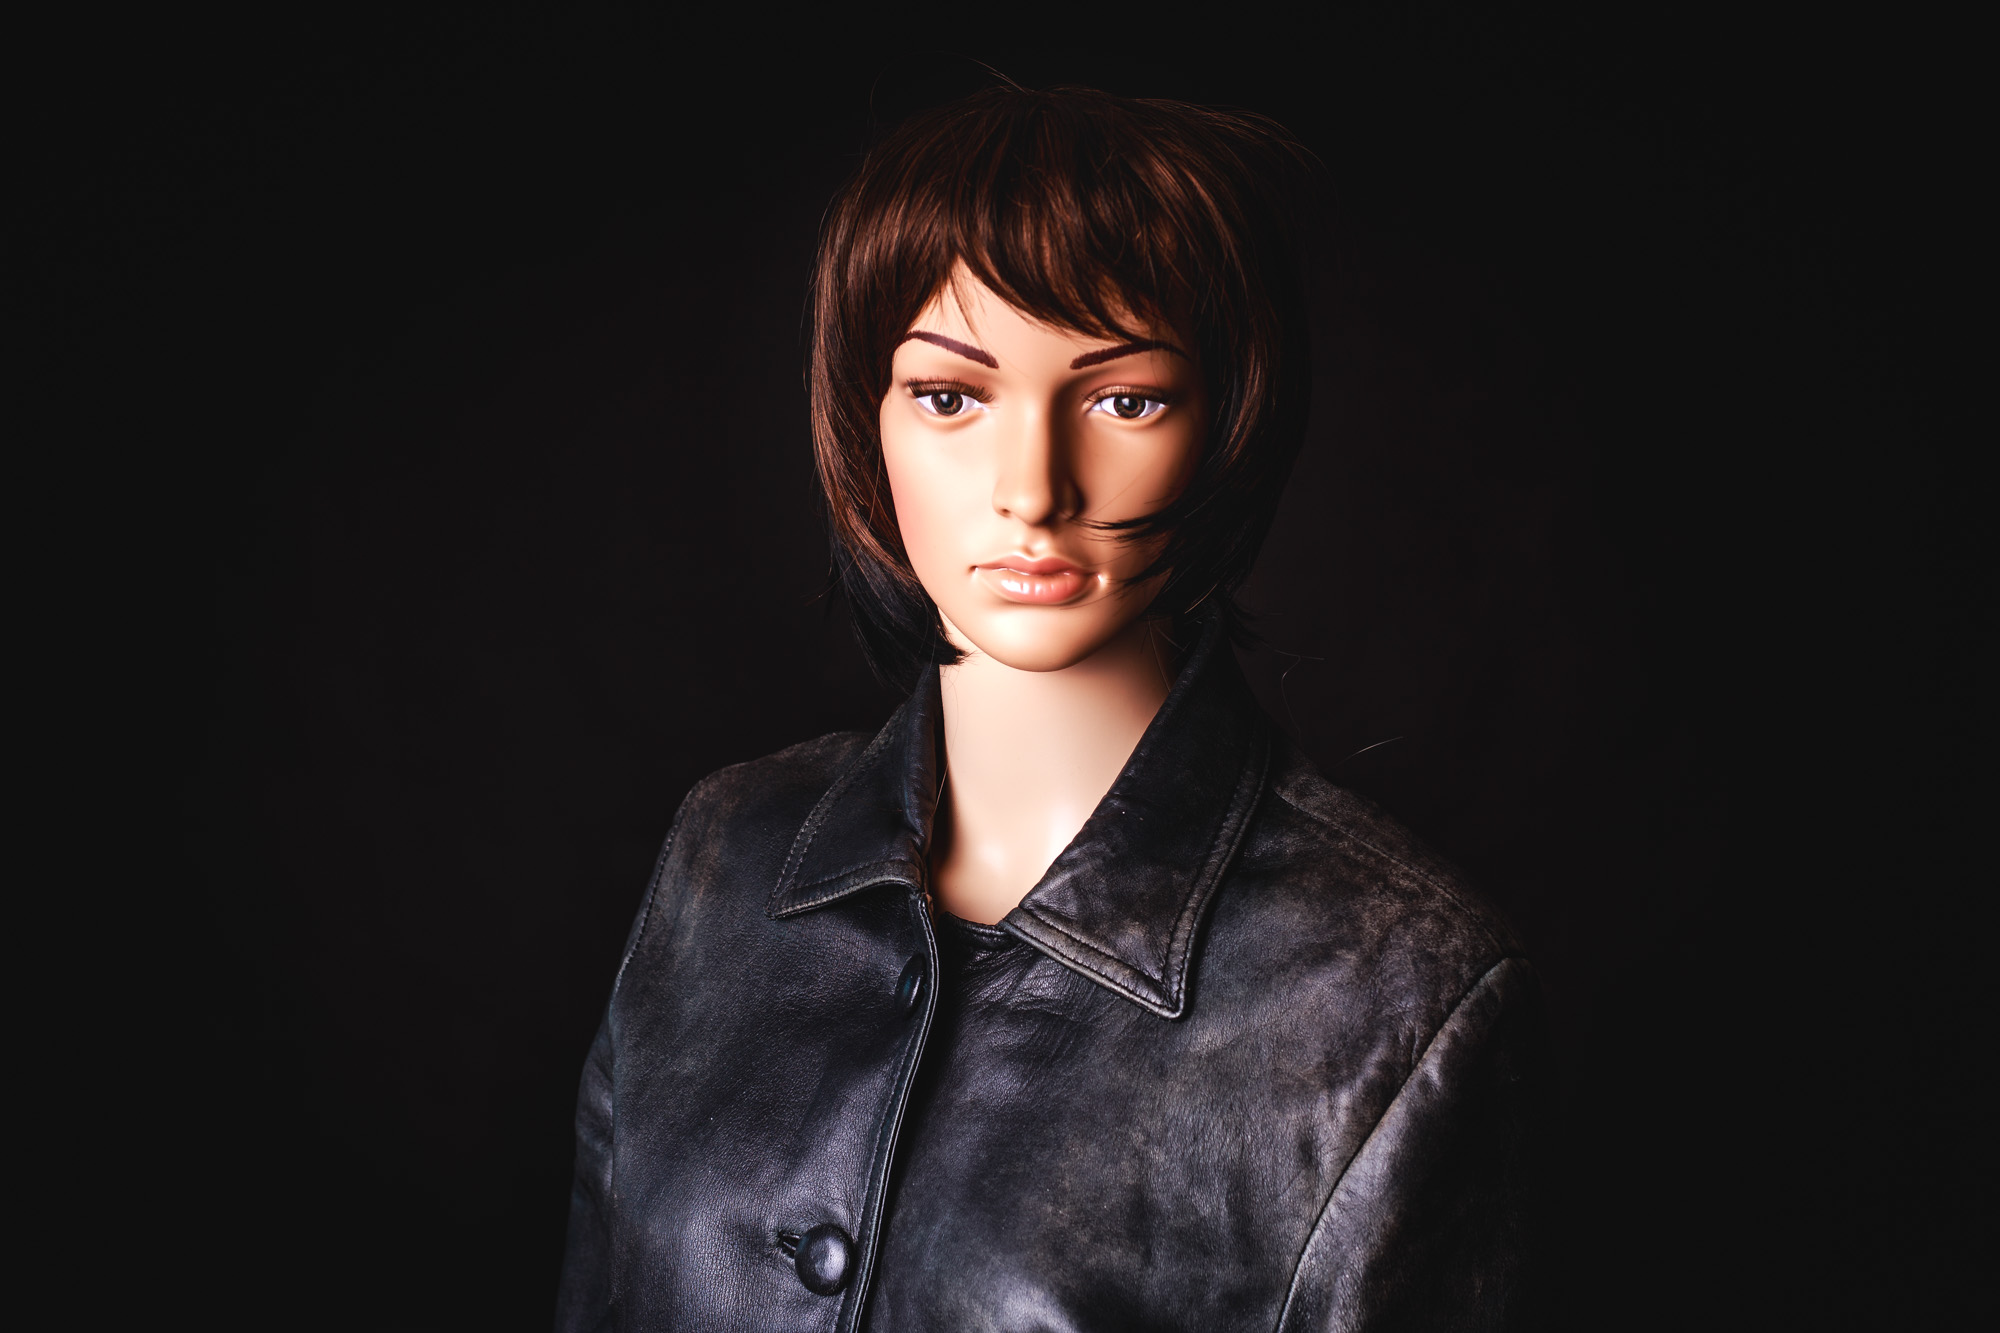
The thought process for this shot of Lærke (see the whole series here) was similar. The goal was again to have a high contrast between the lit part of her face and the dark part of her face. Instead of facing the light source, she was facing the camera though.
The Math
The inverse-square law states that there is an exponential relationship between the distance of your light and the amount of light hitting your subject.