How to Record Your Editing Process for YouTube
If you want to show your editing process to potential clients or peers, you can make use of YouTube and let them peek at your creative process. You can show some processes or techniques in Photoshop, Lightroom and the like and see what other visual artists do and get inspired by them.
The beauty of YouTube lies in its accessibility and ease of use. Everyone can create and upload videos and thus share their view of the world, share their knowledge and connect with others. Well - almost everyone.
You personally will benefit from expanding and strengthening your brand and being able to to network with others photographers. If you talk in your videos, it might also improve your (public) speaking and train your teaching skills.
Different types of videos
There is a variety of videos that can be produced depending on equipment and focus on complexity you are going for. Here are some examples including hw easy or difficult they are to produce:
-
Simple editing recordings in 1:1 time without commentary - You only need a recording software and to upload the final video to a platform like YouTube. To make it more fancy and entertaining, you could listen to some music on the side that will get recorded as well - watch out for copyrighted music, though.
These are the most simple videos to produce. They can be boring and are more focused onbeing inspirational. -
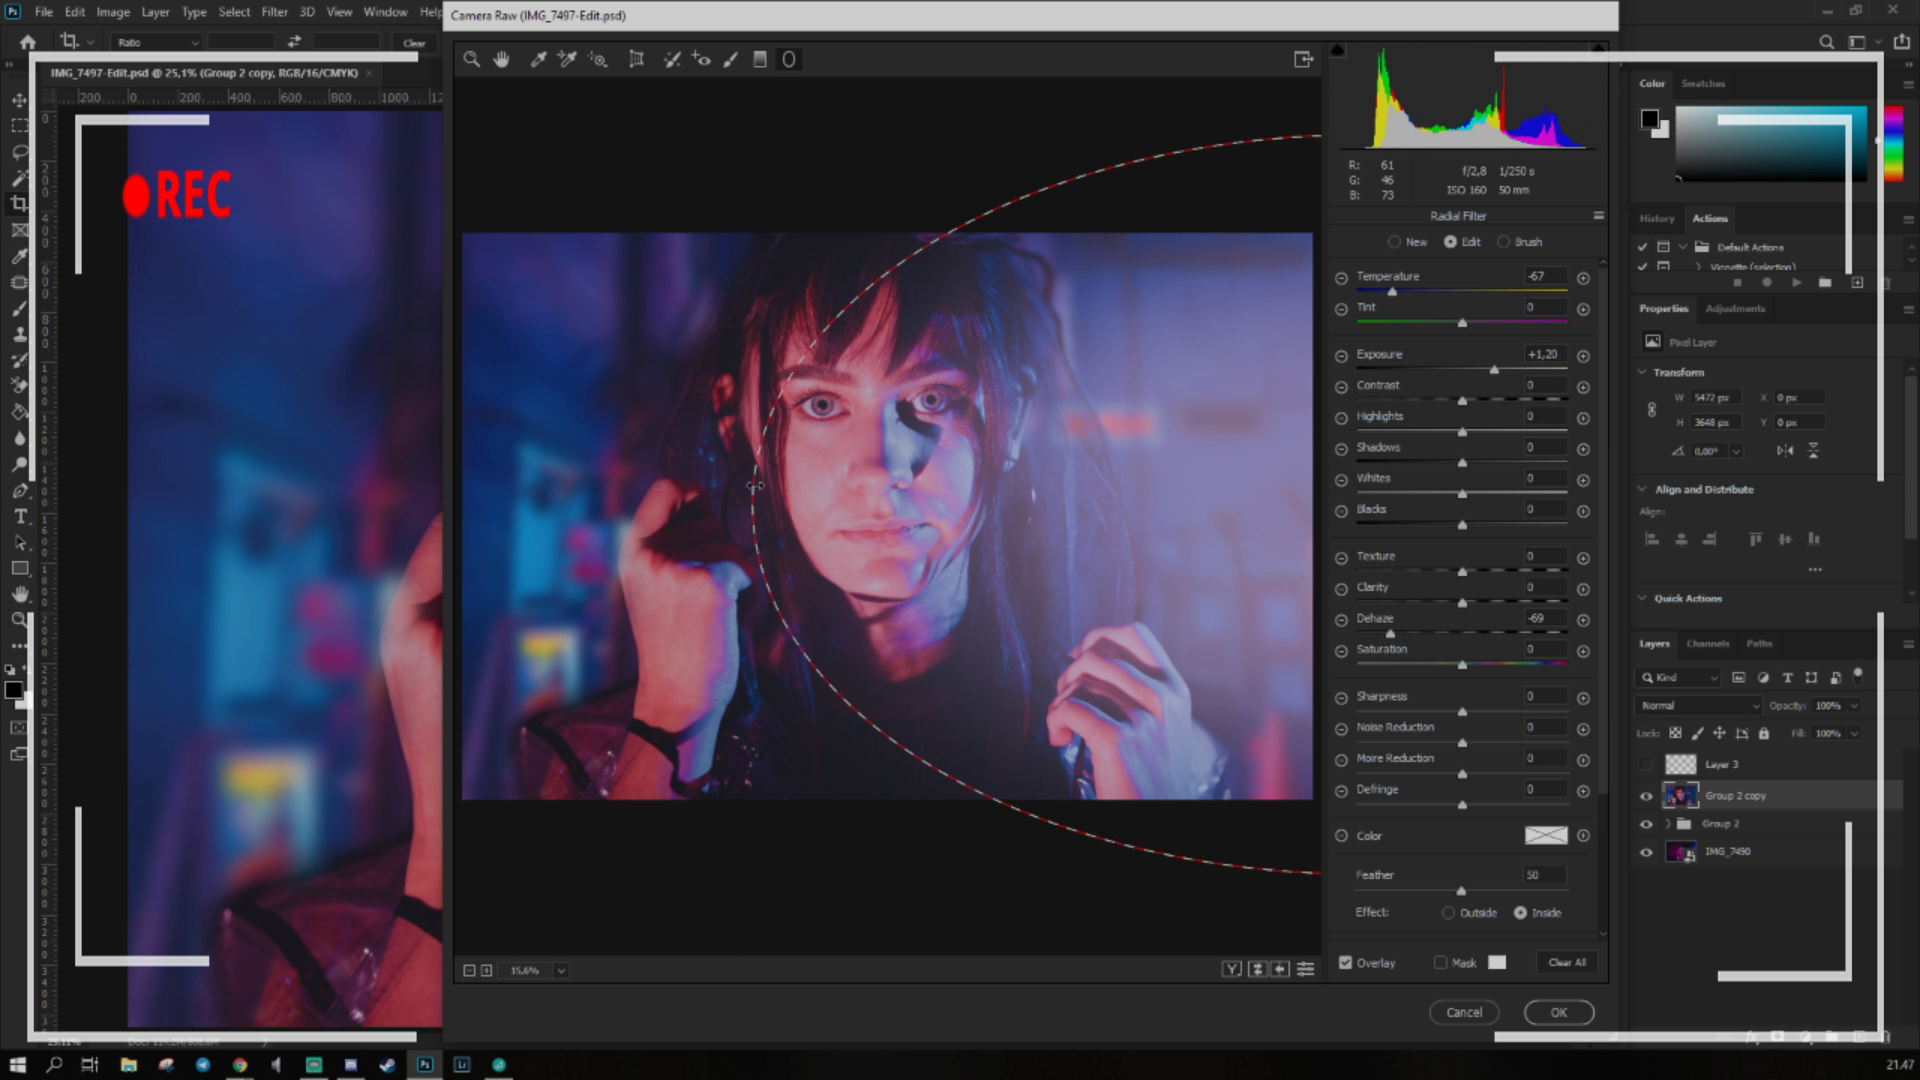
Editing timelapse - To illustrate the process from unedited RAW photo to the final result a timelapse of the editing process can be enough. To create a timelapse you would need some kind of video editing software to post process the screen recording - they can be simple and free.
This is what we did with editing recordings we had from some livestreams: -
Editing recording with commentary - With a microphone you can easily record commentary to your editing process to make an educational video.
How to record your screen with OBS Studio
It is pretty easy to record your screen. Install OBS Studio. It is free and available for Windows, Mac and Linux.
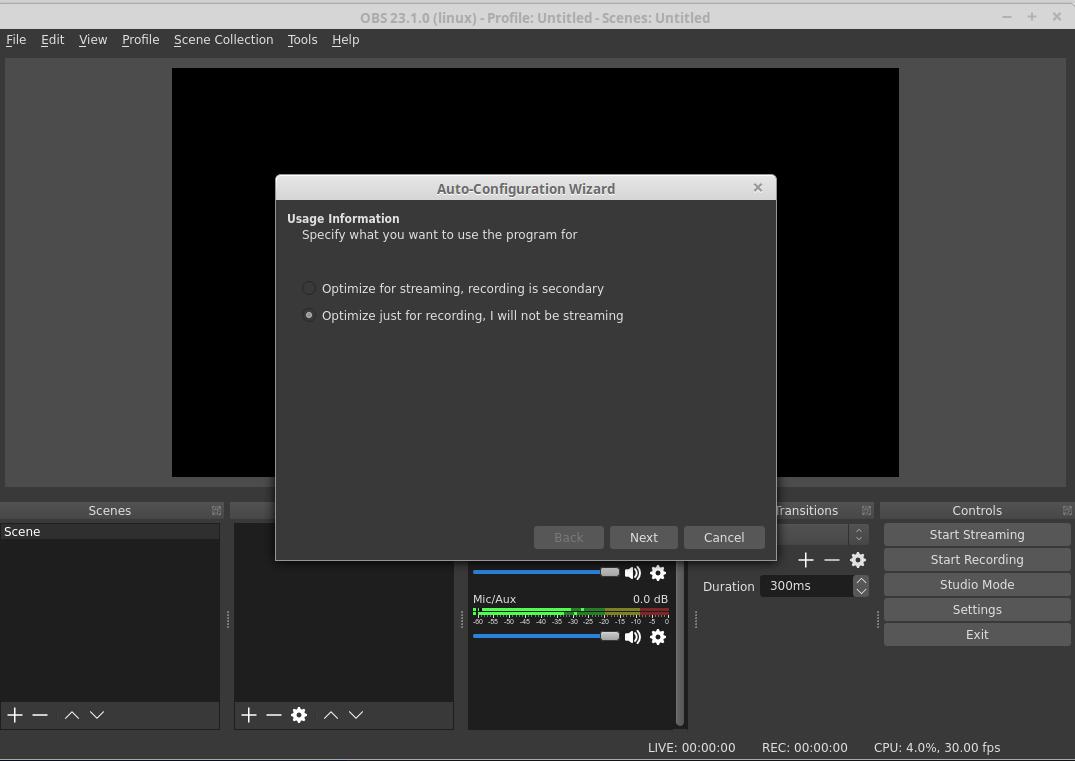
Run the setup wizard when you start the program for the first time. When prompted, tick off the box to optimize for recordings instead of streaming.
When confirming the settings, it’s enough to set 30 FPS. Unless your’re editing at light’s speed you would not need 60 FPS for just an editing recording.
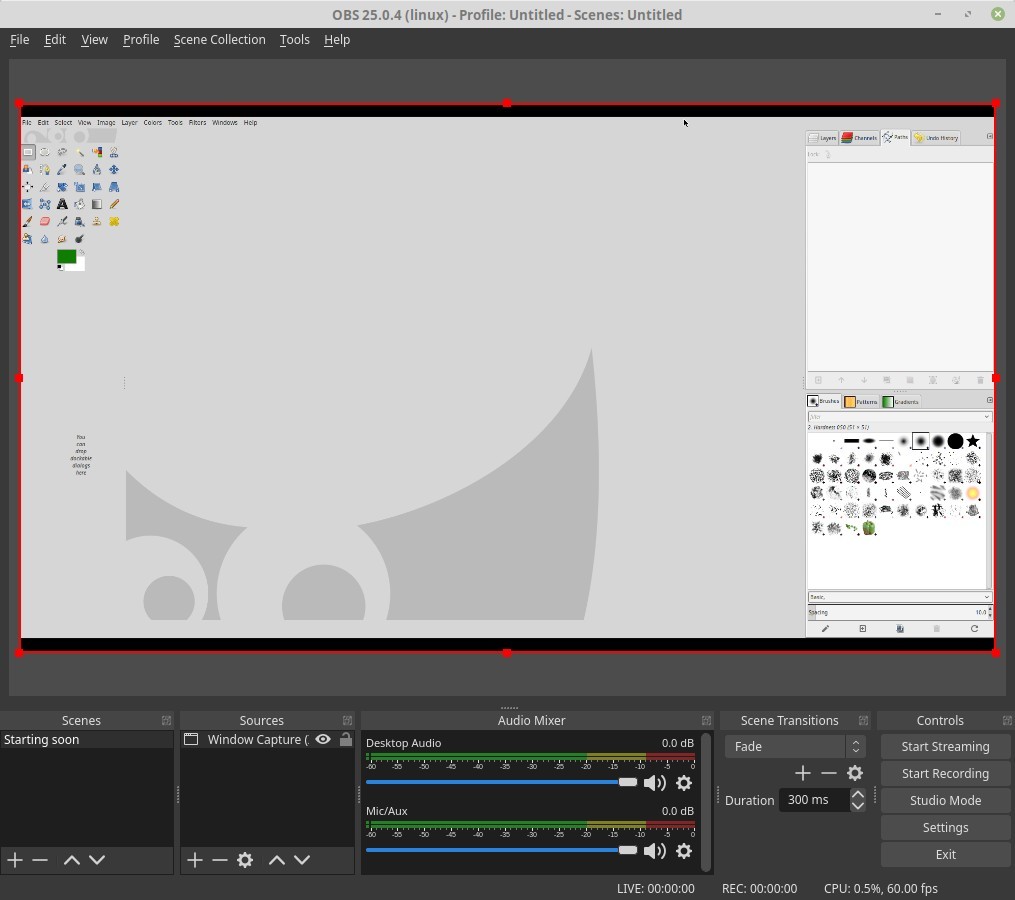
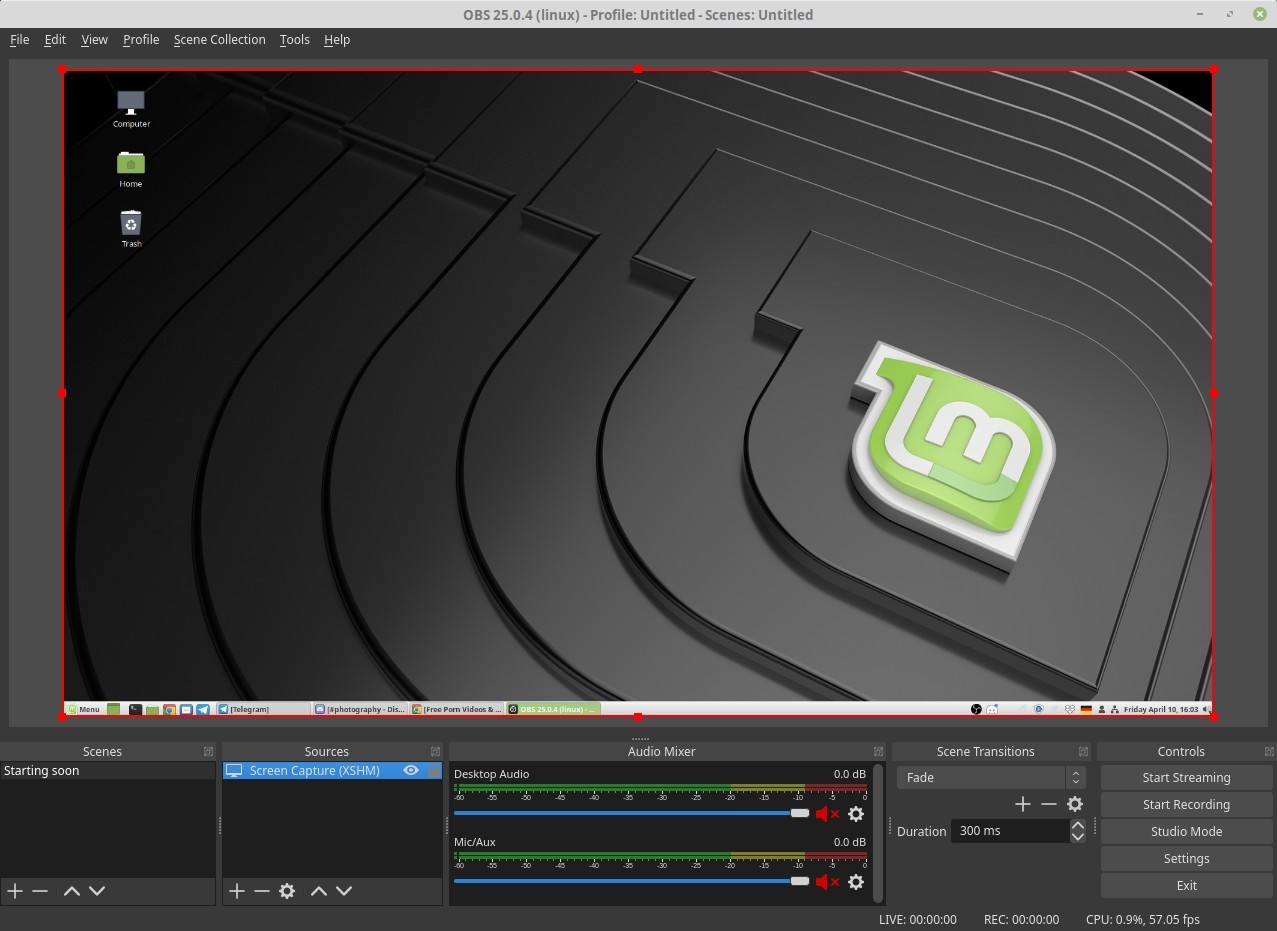
This is the default window of OBS Studio:
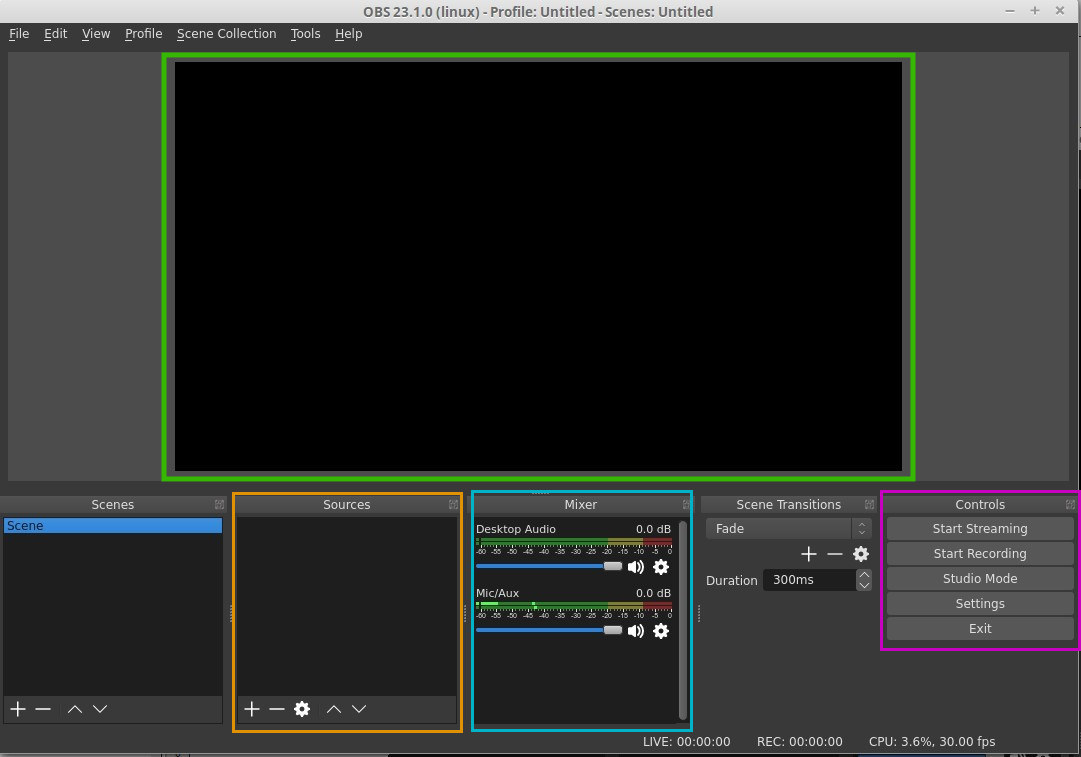
Green
This window will show a preview of what you’re recording.
Orange
This is the Sources-window where you will define what you want to record.
Blue
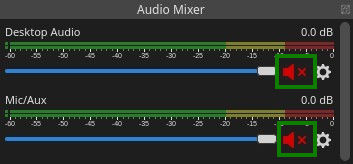
The audio mixer is important if you want to record sound as well, for example through a microphone. If you don’t want to record any sound whatsoever, you should mutethe two default volume bars by clicking on the speaker icon.
Purple
All kinds of settings for your recording like for example the quality and size of the output file.
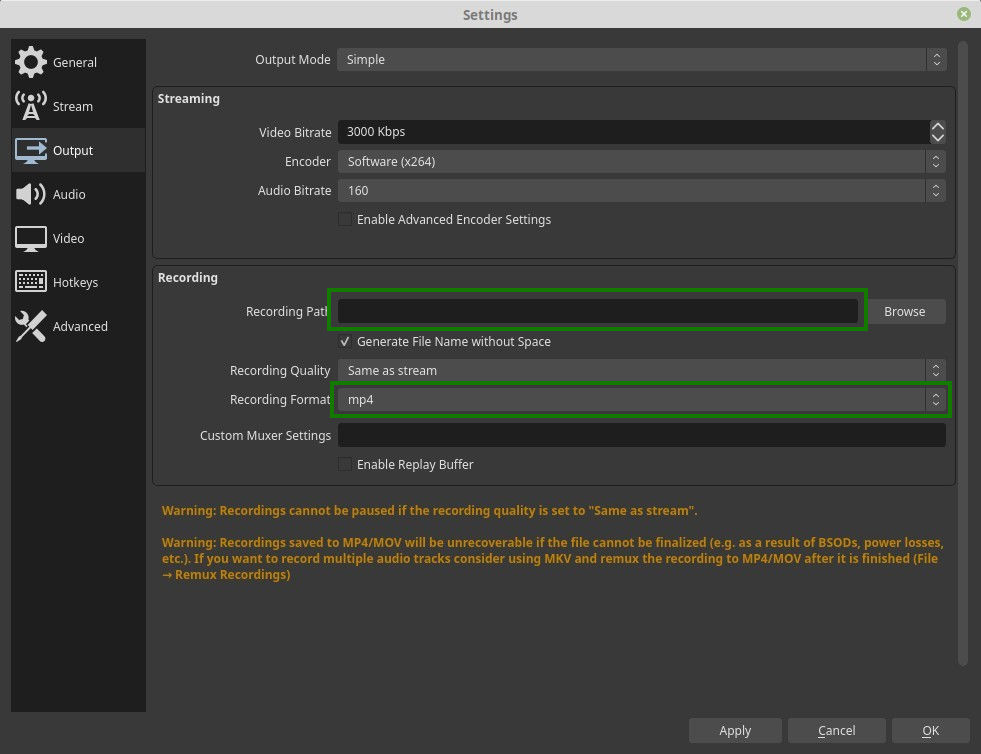
Settings
Under Settings you mainly only want to navigate to the Output tab and set the path to the folder where the videos will be saved and the file forma. I recommend to set to mp4. Feel free to dig into the settings further if you like to, but it is not necessary for simple recordings.
Defining the source
When we define a Source in OBS Studio we basically tell the program where to look and record something. There are different ways of recording what you see on screen, the two relevant for you would be the following:
- Window Capture - I recommend you use window capture if you know that you will only use one program during your editing process. The advantage is that OBS Studio will only record this program even though other program windows are covering it.
- Screen Capture - During screen capture, OBS Studio will record everything that happens on your screen. If you for example switch between Lightroom and Photoshop, using this capture mode is recommended as you don’t have to tell OBS Studio that you did that. On the downside, you need to be aware of what is happening on your screen - every notification popping up will be recorded.
You define a source by clicking on the plus icon in the bottom of the Source tab:
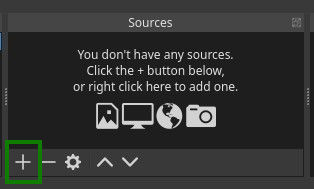
From the dropdown menu either pick window capture or screen capture.
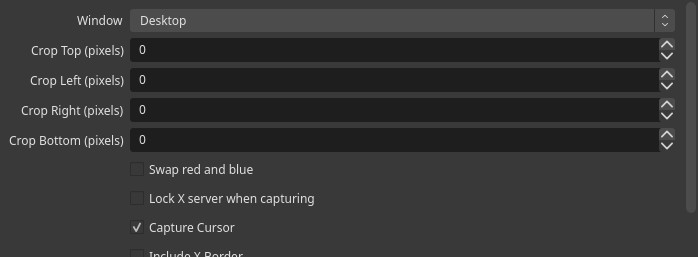
If you pick window capture you need to define which program to record from the Window dropdown menu:
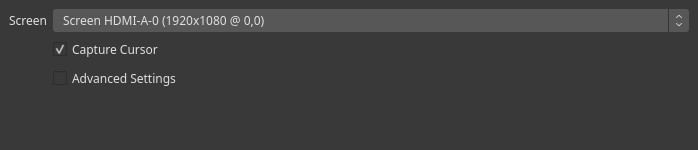
If you pick screen capture and are working with more than one monitor, you might need to switch to the respective monitor in the following window:
You should now see either the window or screen in your preview window.
Below is a screenshot of the preview when picking window capture. You only see the program defined which in this case is GIMP.
This is an example of screen capture. I haven’t started any programs yet, so you can actually see my desktop background (which could have been very personal). You can also see that I use Telegram and Discord - and that I was browsing for porn on my browser (for educational purposes to take this screenshot). If you should accidentally open the Excel file with all your personal passwords these would be exposed in your recording as well (please use password managers).
If the size of the source does not match the size of the preview window, right click in the preview and pick Transform => Fit to screen.
Sound settings
If you don’t want to record any sound whatsoever, make sure to mute all audio input:
If you want to record the sound you’re listening to (for example music), keep Desktop Audio unmuted and adjust the volume appropiatly.
If you want to record audio from your microphone, you should aim for the bar to reach the yellow part of the bar on average.
No input from the microphone
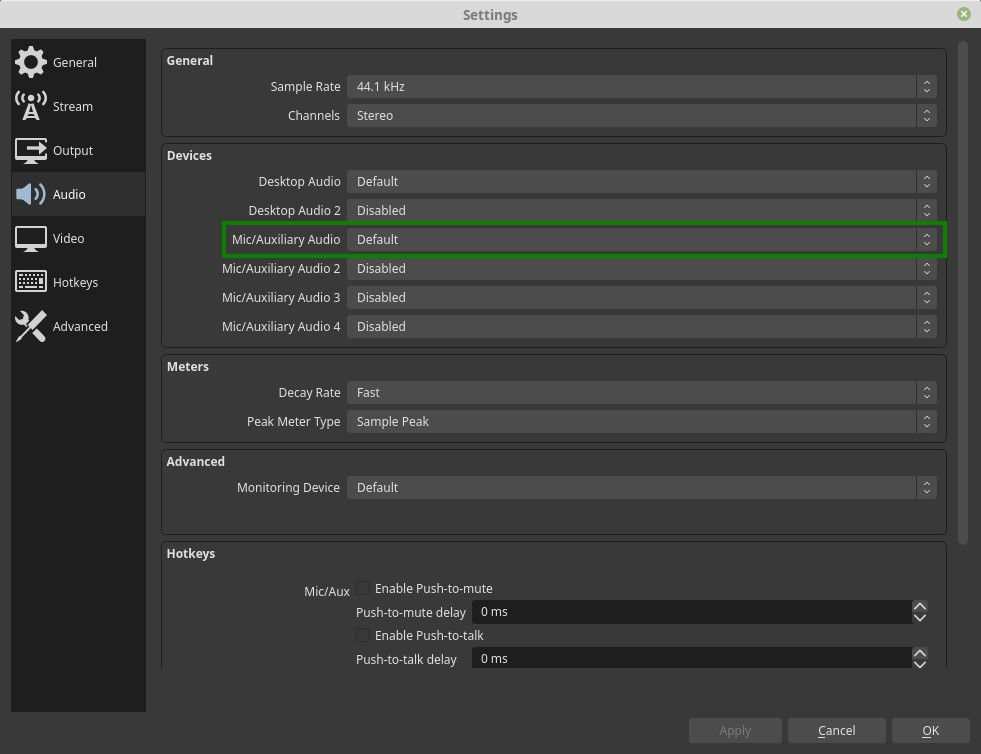
There can be multiple reasons why there isn’t any input from your microphone and not all of them are related to OBS Studio.
To start troublshooting, have a look at the Audio tab under Settings and make sure that your microphone is selected as the input source.
Hit record!
And that’s it, you’re all set to record your editing process now!
Click on Start Recording and get to work. Remember that recording cannot be paused - if you stop and restart the recording, a new file will be generated.
After the recording
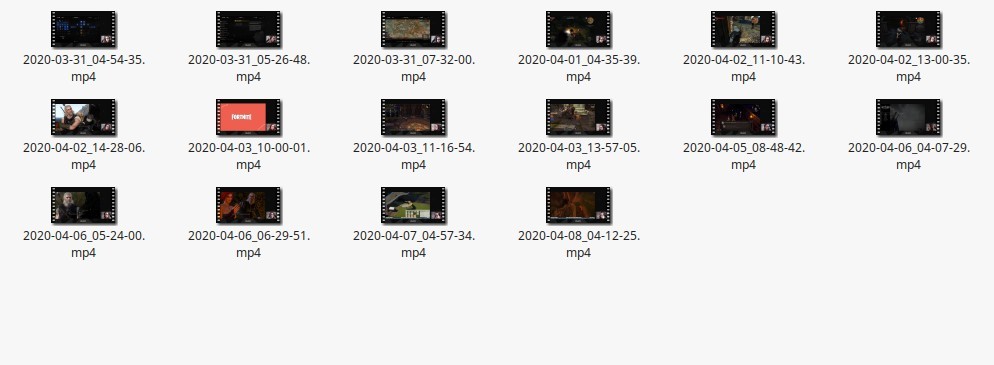
As soon as you stop the recording, your files will automatically be placed in the folder you set in the beginning. They will look similar to these:
To edit the files further, for example to shorten them or speed them up to create a timelapse, you need further editing software. OBS Studio cannot edit videos, only record them.
Premiere Pro is professional video editing software by Adobe. A free alternative is OpenShot.