How to Quickly Export Before / After Shots From Lightroom
If you like to share your knowledge in terms of photography and editing in Lightroom, you probably want to show before and after versions of your work.
I used to export the photo with and without adjustments as two seperate photos and then combine them in Photoshop.
There is a way to do that without leaving Lightroom, though! It’s not as automated as I wished and therefor only semi-fast, but I take what I can get.
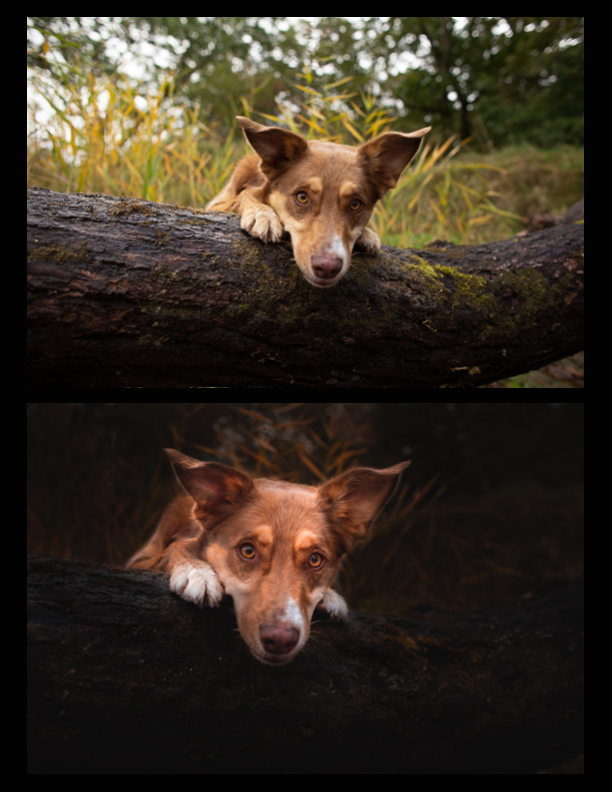
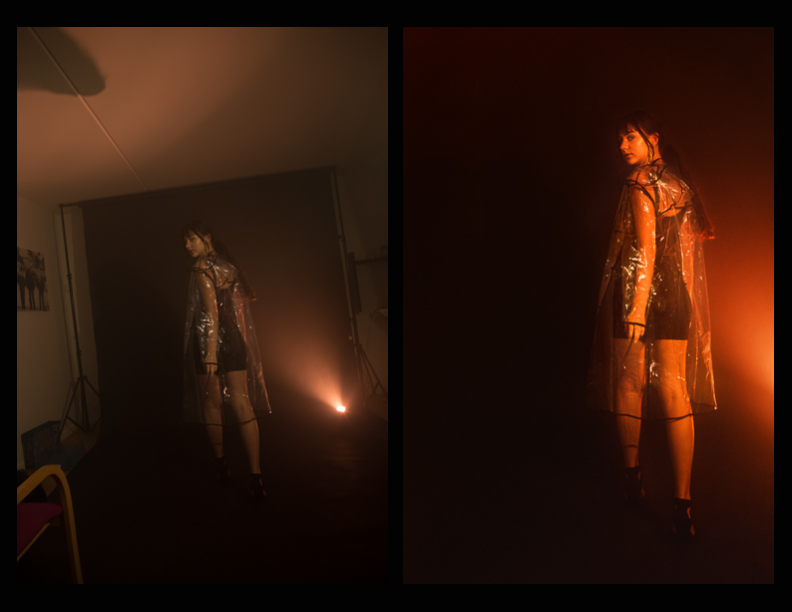
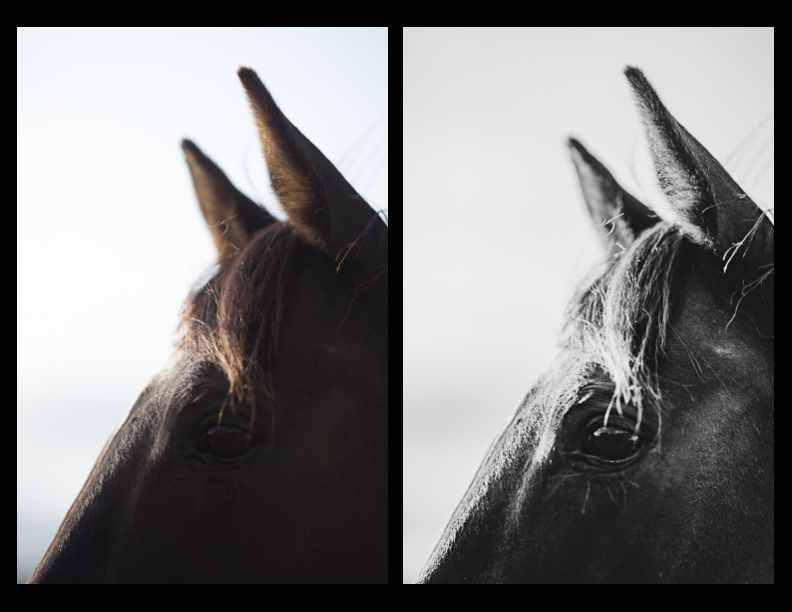
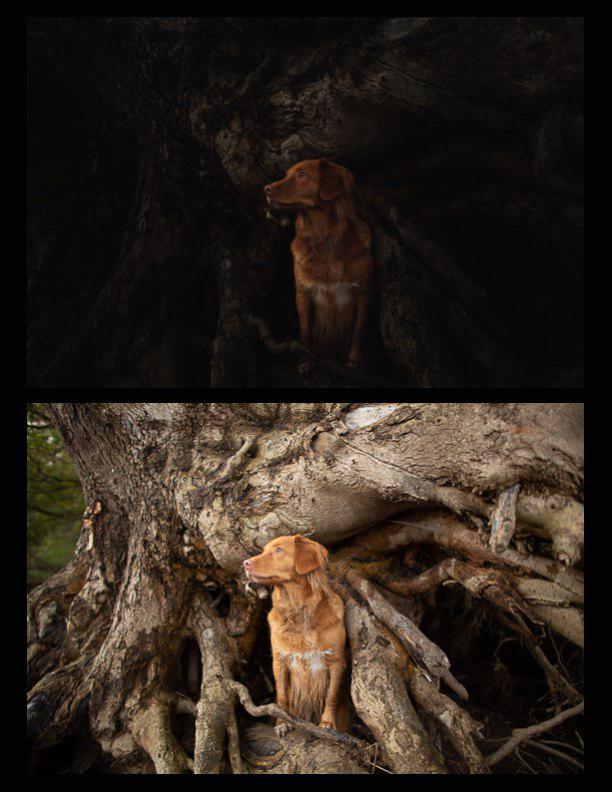
Here are some examples:
Process Before Exporting Before-After Comparisons
To export a combined single image with a SOOC (straight out of camera) and an edited version, you will need to have the following in your Lightroom catalogue:
- the edited photo
- a virtual copy of that photo without any edits (SOOC)
You can adjust your process in a way that it starts with creating a virtual copy of each image you’re about to edit. Give it a rating or color label to be able to hide it with filtering and then finding it later.
After you edited, make sure that you have both versions visible in the overview/filmstrip in the bottom:

Here is a screenshot of my filmstrip with eight edited images and their eight unedited counterparts.
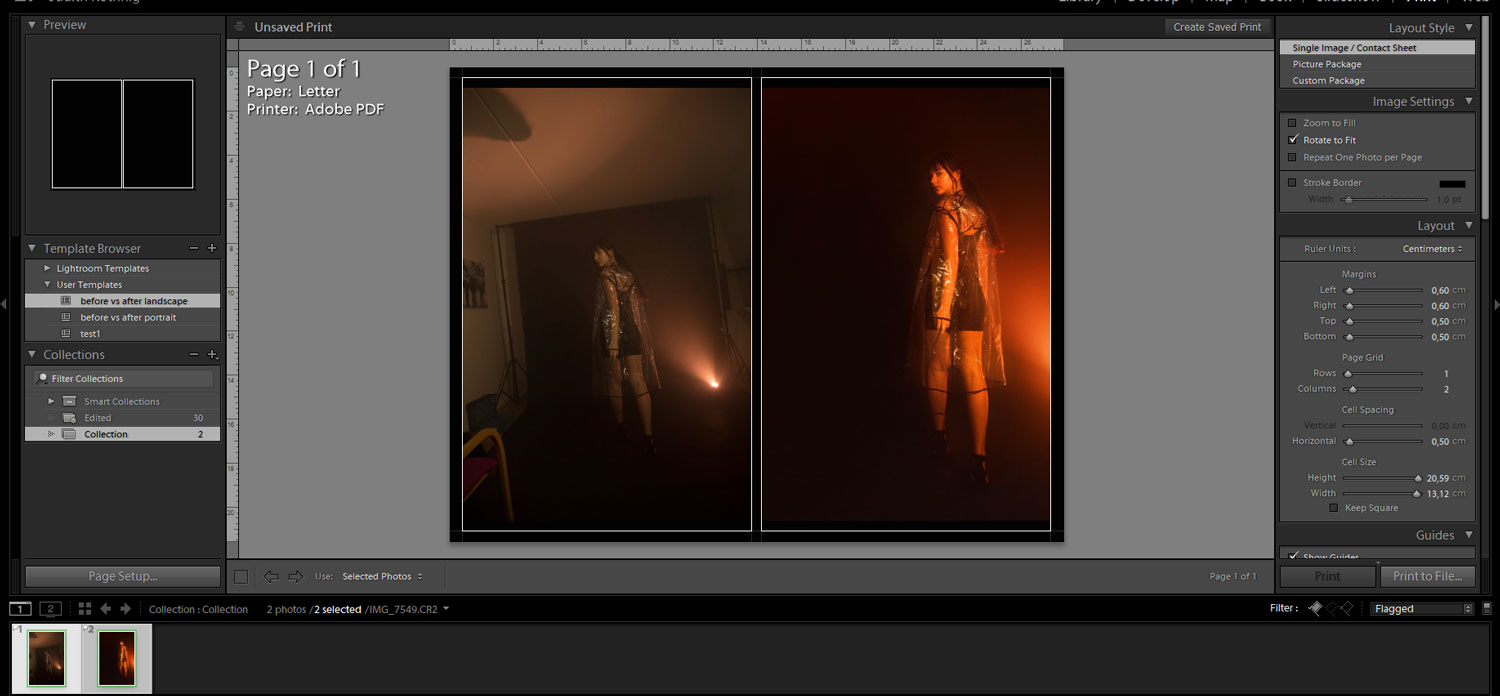
Setting up Print Templates
When your’re finished editing, move on to the Print section in Lightroom. No worries, we won’t print anything - at least not on paper!
On the left side, click on the + in the Template Browser tab to create a new template. Name it whatever you like, for example 2Bore & After” or “Side by Side”.
Under Layout on the right side you can now decide how many rows and coloumns you want the page to be divided into. As I only want to show a comparison of two images, I will go with 2 rows and 1 column.
I also want the background to be black, which I set in the Page tab.
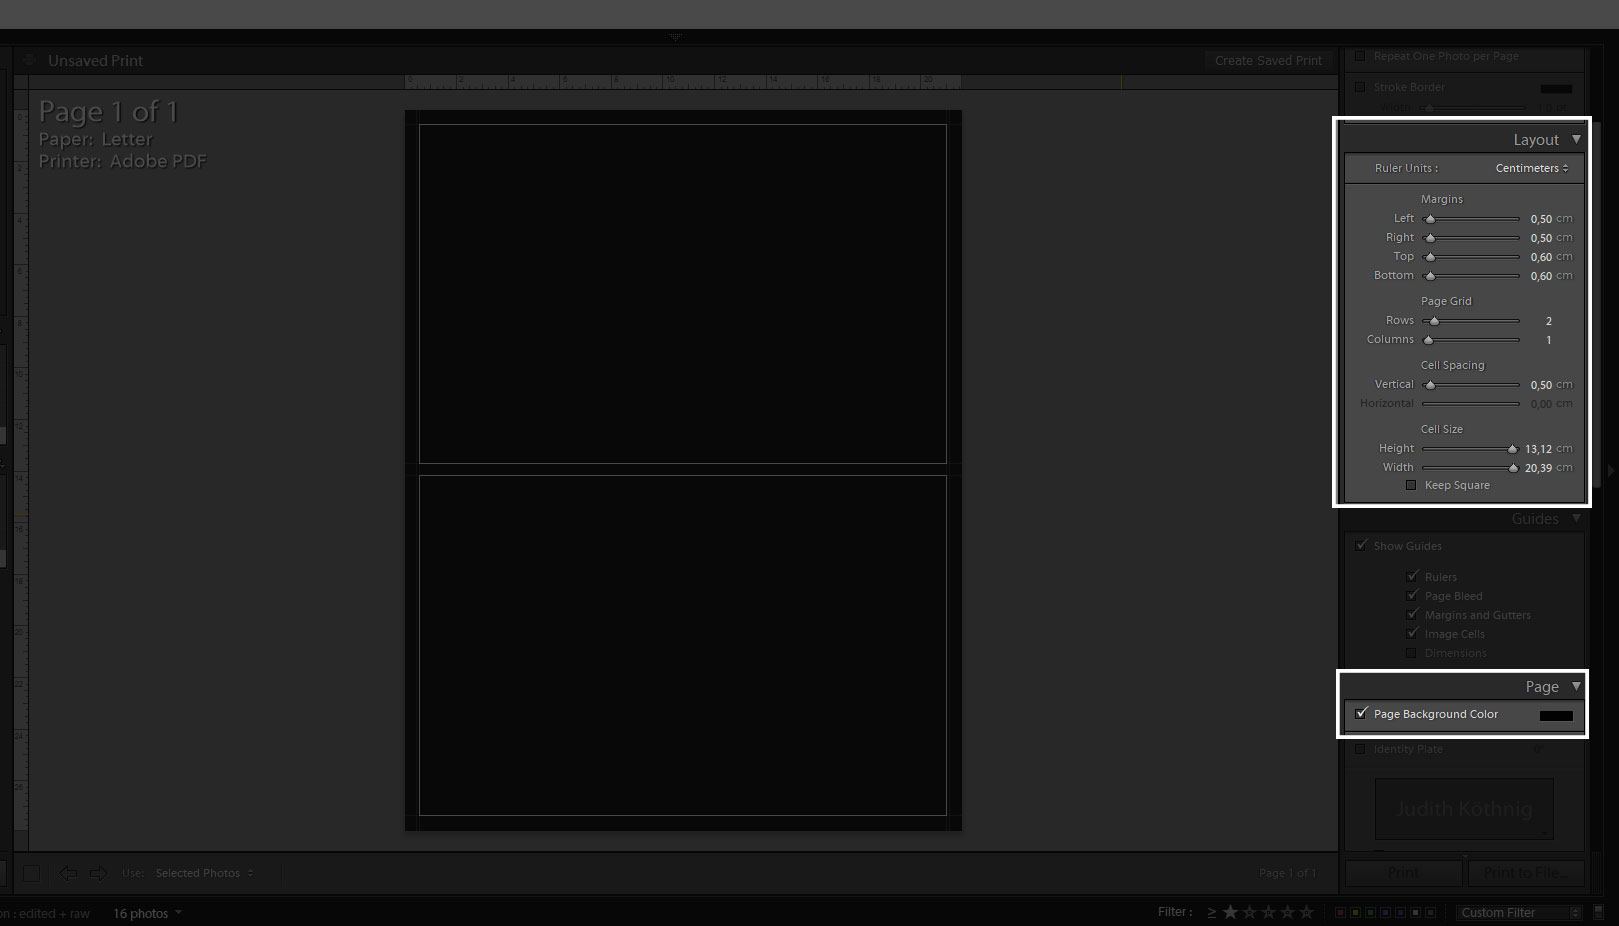
To save the template, right click on it in the Template Browser and update with current settings.
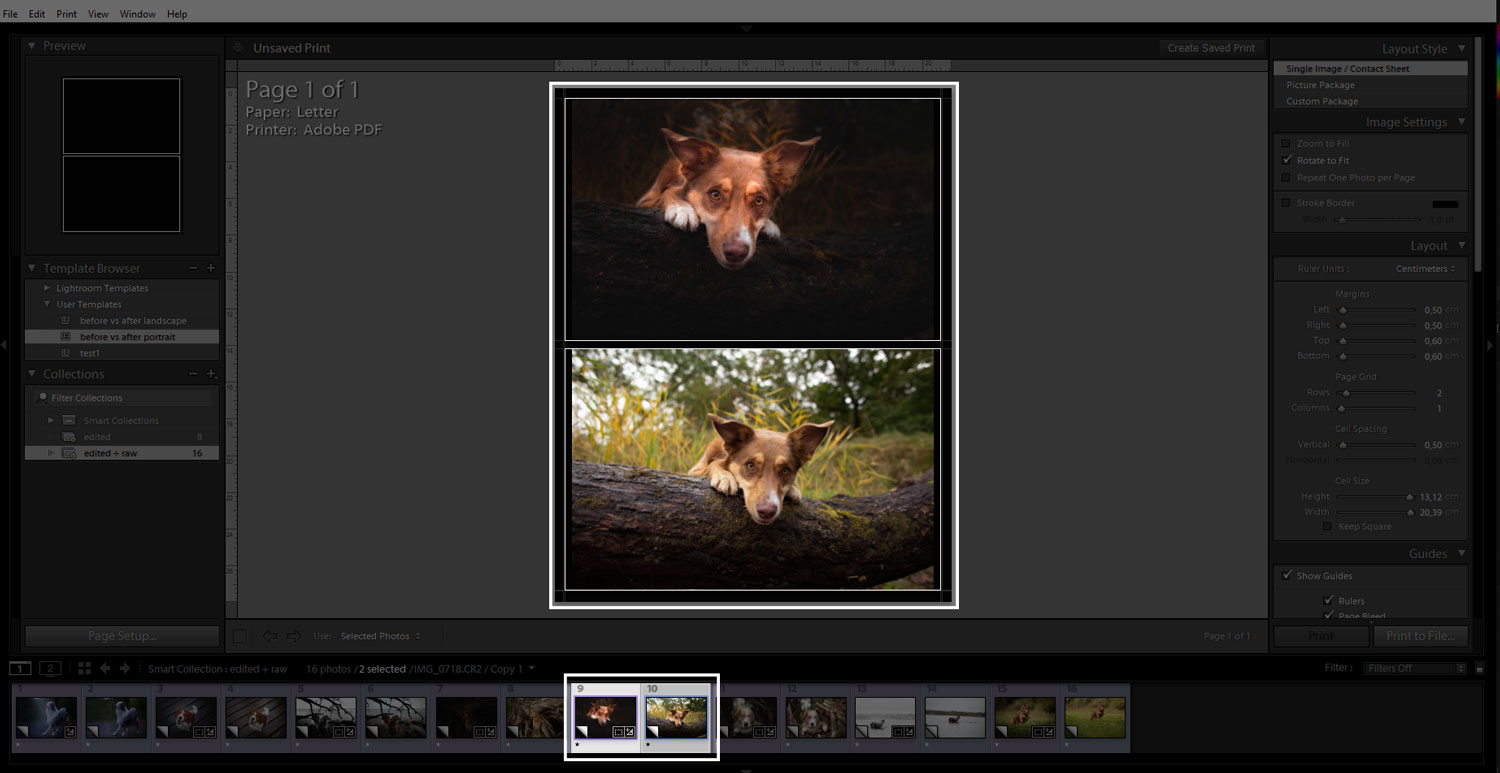
Nice. And how exactly do I put my images in there now?
Pretty simple: the images you have selected in thefilmstrip in the bottom will automatically get put into the cells.
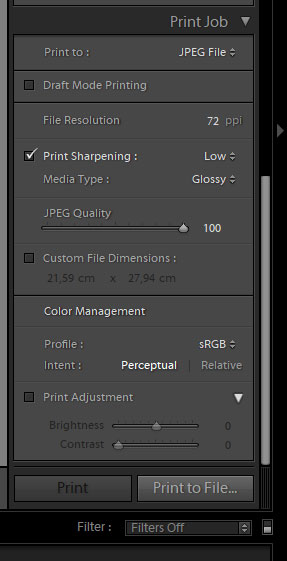
For saving remember to set the Print Job settings to “Print to: JPEG File”. Then simply hit the “Print to file”-button in the bottom right corner - done!
Unfortunately, you still need to do it for every single comparison and you need to type in the file name manually. Also, you will have a lot more versions to manage in your catalogue - this might finally make you get used to rate, flag and label all your photos though!
Even though this process is not perfect, I like it as I can stay in Lightroom and have a consistent style for my before and after comparisons.
Ehm - I’d like the comparison to be in landscape mode, though …
Very good! Click on the “Page setup” button in the bottom left corner and change the orientation to Portrait!
Changing the Print Preview Order
When selecting the images in the filmstrip in the bottom, Lightroom will always put the first image in the top/to the left. That can be quite annoying if the first image turns out to be the final, edited one:
Not so much a “before / after” now, is it?
There is one way of controlling the order of the images in the filmstrip:
Select all the photos that you want to be included in comparisons - both befores and afters! (They don’t need to be in one single comparison file)
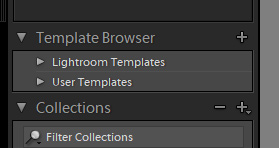
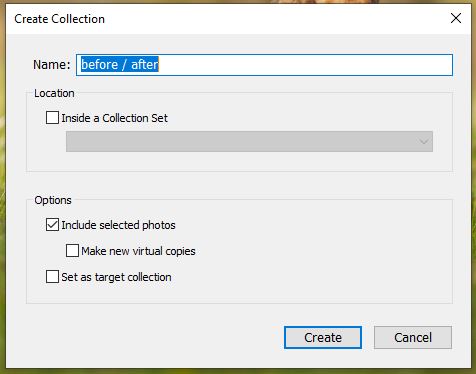
While still being in the Develop tab in Lightroom, click on the + to the right of Collections and create collection.
In the following pop up window, give your collection a name and remember to check of that all the selected photos should automatically be included in this collection.
Now you can freely drag around the photos and place them in the order you like!
Custom order is not possible with smart collections, unfortunately! So remember to use standard collections and fill them with your photos manually.